Categories
Creator success Growing your brand Spring store tips

Build Your Brand: How to Get Your Spring Store Its Own Domain 

Securing a custom domain for your Spring store can level up your brand’s game and make your Spring store seem more trustworthy to your fans. And Spring makes it easy! You can either buy a domain directly from Spring or connect one you purchased elsewhere. 

But before we get into that, what exactly is a custom domain?

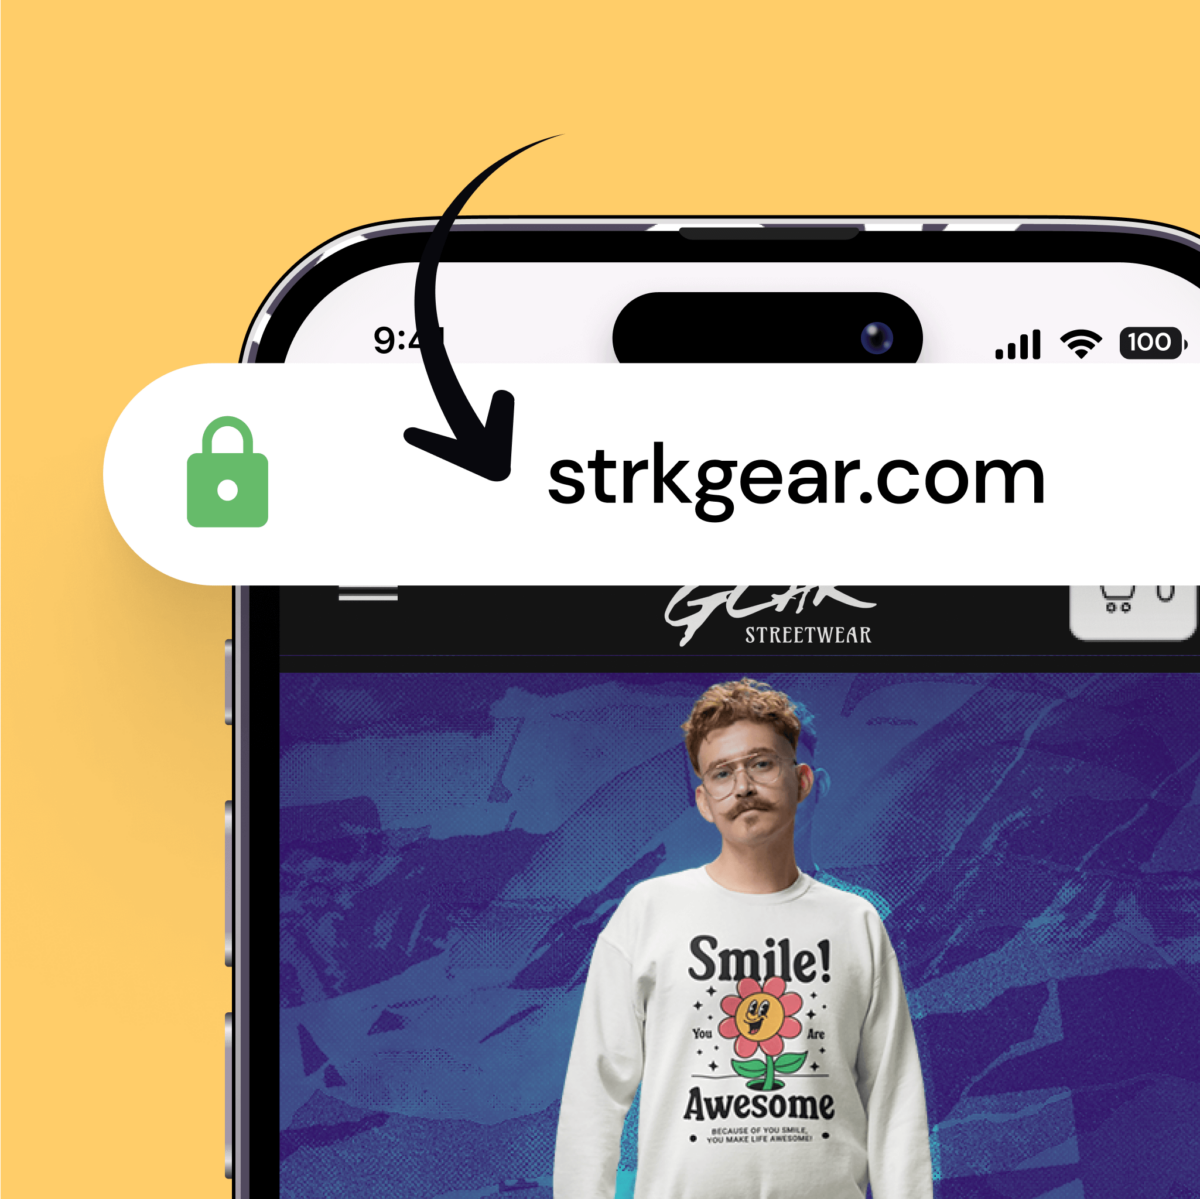
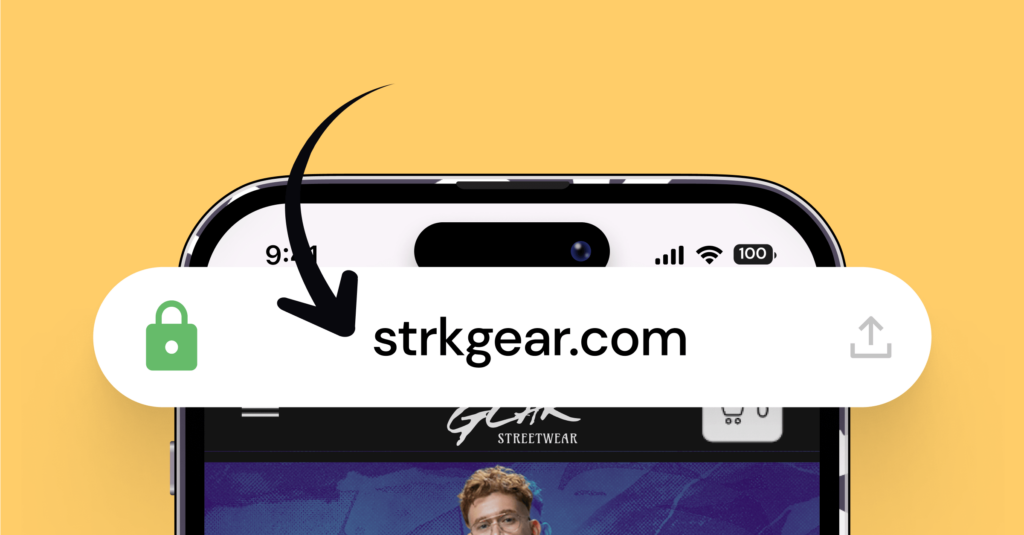
A custom domain is essentially your own unique web address, like “yourbrand.com.” It’s a key piece in distinguishing your digital presence from others. 

Unlike the generic URLs that Spring hands out when you start, a custom domain that echoes your brand vibe not only boosts your visibility but also gives off some major professional vibes. 

People feel safer and more inclined to shop with brands that look polished and committed. When you connect a custom domain to your Spring store, you’re not just opening up shop—you’re building trust and deepening your connection with your audience. This can really set you apart from the crowd, making your brand the top choice in your niche. So, snagging that perfect domain isn’t just a techy detail—it’s a smart move that can drive your brand forward.

So, with that said, let’s get into how to connect an existing domain to your Spring store and how to purchase one if you don’t already have one. 

How to purchase a domain

If you already have a domain, skip to the next step. But if you need to buy one, you’re in luck. Spring allows you to purchase your very own custom domain directly from your Spring account. Read the steps below and then click here to buy one! 

Follow these steps to buy a domain:

1. Log Into Spring:

Hop on your Spring account to get started.

2. Navigate to Your Dashboard:

Click on the “Stores” tab in your dashboard, then select “Purchase a Domain.”

3. Find Your Perfect Domain:

Pop your ideal domain name into the search bar. You’ll see a list of available domains right at the top. Each one comes with the price tag for a yearly subscription, making it easy to compare and choose. If the name you like isn’t available, try switching up the ending—instead of .com, how about .net or .co? 

4. Fill in Your Info:

Drop in your address and choose if you want your domain to auto-renew each year. Then, you’re ready to hit checkout.

5. Complete Your Purchase:

Once you complete your purchase, we’ll automatically handle the DNS records verification. Your domain goes live instantly—no waiting around!

6. Verify to Activate:

Look out for a verification email and follow the prompts to confirm your contact details. 

Once you verify your info, your Spring store URL will automatically change within 24-36 hours!  

How to connect a domain

If you’ve purchased a domain somewhere outside of Spring, you can click here to connect it to your Spring store. 

Heres how to do it:

1. Edit Your DNS Settings:

Head over to your domain registrar’s control panel. You’ll need to add a couple of DNS records to link up your domain with your Spring store:

  • A Record: Add this (also known as the root record) to make sure anyone visiting your domain (like thecreator.com without the www) lands on your Spring store.
  • CNAME Record: This one makes sure that visitors to www.thecreator.com also get directed to your store.

2. Update Settings in Spring:

Once you’ve updated your DNS settings:

  • Go back to the “Stores” tab in your Spring dashboard.
  • Find the domain you’re setting up and click the ‘Setup incomplete, click to resume’ button. This checks if your DNS settings are pointing right.

3. Verify Your Setup:

  • If the initial check doesn’t work, hit the button again. Double-check the DNS records in your registrar’s panel, correct them if needed, and try verifying once more.
  • Verification might take a few minutes. If it’s still not working, just click the ‘Verify’ button again.

4. Success!

  • Once your DNS records are confirmed, you’ll see a success message, and you’re all set—your domain is now connected to your Spring store!

Grab a domain to help your brand stand out and grow!

Investing in a custom domain for your Spring store is more than just a tech upgrade; it’s a game changer for your brand’s vibe and trustworthiness. By stepping away from generic URLs, you’re not just making it easier for your fans to find and remember you—you’re showing the world you’re serious about your business. 

A unique domain means you’re all in, creating a professional, sleek image that attracts customers and makes them feel secure when they shop. Think of it as your brand’s digital home base, where everything you do comes together under one memorable address.

Plus, hooking up a custom or existing domain with your Spring store only takes a few minutes and is super beneficial. It keeps your marketing tight and drives all your social media followers straight to one spot without any detours. This direct line doesn’t just enhance the shopping experience but also boosts your spot on search engine radars. 

Getting set up is simple, quick, and all about letting you focus on your passion while we handle the tech stuff. So, why wait? Grab that custom domain, and let’s take your brand from just buzzing to absolutely booming!Buy or purchase a domain here!

Categories
Creator success Promoting merch

Creative Ways to Use Product Samples to 3x Your Sales

You’ve poured your heart and soul into creating some killer product designs (if you missed this step, read how here!), but now comes the real challenge: getting the word out there and making sales. 

Thankfully, using samples of your products in your content is an easy way to do that! In fact, Spring creators who show off their products in their content triple their sales on average.

Why does it work so well? Well, when your fans see you rocking your own stuff, it shows them that you actually like what you created. They trust your style and want to follow your lead. Plus, when they see you actually using the products yourself, it’s way more convincing than just tossing up a stock image of your merch.

So, with that in mind, follow the steps below to start using samples to amp up your sales! 

Step 1: Order your samples

Before going any further, you’ll need to actually order samples of your products in order to start using them in your content. 

To order samples, watch this video or follow the steps below:

  1. Sign into Spring
  2. Click “Listings” on the left-hand menu
  3. Click “Order a sample” of the product you want to order
  4. Fill out your shipping and payment information
  5. Click “Place your order”

You can also click here to go directly to your listings page.

Samples take a few days to arrive, so make sure you order them at least a week before you want to start posting content about your products! 

Step 2: Create content with your samples

Alright, now that you’ve got those product samples in hand, it’s time to get creative with how you show them off to your crew. Here are some creative ways to promote your products in your content:

  1. Unboxing Videos

Time to spread the hype! Share the excitement of receiving your products with your audience by creating unboxing videos. Show every detail and capture your genuine reactions. This personal touch can significantly increase engagement and anticipation among your followers.

  1. Styled Photo Shoots

Get your creative juices flowing with a photo shoot featuring your products in different settings and styles. Whether it’s a professional shoot or DIY at home, showcase how your products can be incorporated into everyday life or special occasions. Experiment with various backdrops, lighting, and accessories to create visually appealing content.

  1. Live Try-On Party

Host live or recorded try-on sesh where you demo your products in real-time. Invite your audience to ask questions, provide feedback, and even vote on their favorite styles or designs. This interactive approach not only showcases your products but also helps you create community and invites your fans in on helping you make your future product designs. 

  1. Product Comparison Reviews

Put your products to the test by comparing them to similar products you have hanging around your home. If you threw your design on a coffee mug, show it next to a plain white mug that makes yours pop. Or if you have a tank top, hang it side-by-side to an everyday tank that is easily outshadowed by yours. 

  1. Outfit Ideas

If your product samples include apparel or accessories, show your fans how you can mix and match them with other pieces to make a complete outfit. For example, if you have a branded tee, then throw on a blazer, some jeans, and some shoes that make your merch pop. If you have a summer tote bag, then try on a cute summer fit that goes great with you bag. 

  1. Influencer Collaborations

Team up with other influencers to spread the word about your products. Join forces for epic collabs like photo shoots, videos, or giveaways that showcase both your brands. It’s a win-win that’ll help you reach new audiences and boost your street cred.

  1. Storytelling and Brand Narratives

Share the heart and soul of your brand through storytelling. Whether it’s sharing personal anecdotes, customer testimonials, or the inspiration behind your merch, weave a compelling narrative that connects with your crew on a deeper level. It’s not just about selling merch – it’s about building a community.

Now go order some samples! 

By showcasing your products in creative and authentic ways, you not only boost engagement with your audience but also establish trust and credibility. 

Whether it’s through unboxing videos, styled photo shoots, or user-generated content campaigns, each approach offers a unique opportunity to connect with your fans on a deeper level and drive them towards making a purchase. So, don’t hesitate to dive in, get creative, and let your products and your designs shine – your sales will thank you for it!

Categories
Creator success

How to Score More Brand Deals With a Killer Media Kit

Have you ever wondered what makes some content creators stand out from the crowd while others blend into the background? Here’s the secret: it’s all about the media kit!

Your media kit is key to forming exciting brand partnerships, streamlined collaboration processes, and a seriously polished professional image. Sure, your follower count might already turn heads, but a top-notch media kit goes the extra mile by giving brands the back-end details they crave – audience demographics, engagement rates, and past collaborations.

Keep reading to learn how a media kit will benefit you, step-by-step instructions on how to create one for yourself, and where to put it. 

Benefits of creating a media kit:

Media kits are like your superhero cape in the world of content creation, and they come with three superpowers:

1. Showcase Your Influence:

Think of your media kit as your chance to strut your stuff and show brands just how awesome you are. Whether it’s your impressive follower count or your sky-high engagement rates, your media kit is the perfect place to flaunt your metrics and prove why brands should be falling over themselves to work with you.

2. Streamlining Collaboration:

Let’s face it, nobody has time for endless back-and-forth emails and negotiations. But with a killer media kit, you can cut through the noise and make it super easy for brands to see why you’re the perfect fit for their next campaign.

3. Elevating Your Brand Image:

Your media kit is more than just a bunch of numbers on a page – it’s your chance to show brands that you mean business. By putting together a slick, professional media kit, you’re telling brands that you’re serious about your craft and that you’re ready to take your content to the next level. Plus, it’s a great way to stand out from the crowd and make a lasting impression on potential partners.

How to create an epic media kit:

Below we’ve outlined all the steps you need to take in order to create a kick-ass media kit that will impress potential partners. Follow them to create yours!

1. Define Your Brand Identity:

Start by diving deep into what makes your brand unique. Are you the ultimate DIY diva with a knack for turning trash into treasure? Maybe you’re the go-to guru for all things gaming, slaying Twitch streams like nobody’s business. Whatever it is, own it! Define your brand’s vibe, tone, and values. Think of it like creating your brand’s mood board—except it’s all about you!

2. Drop Those Contact Deets:

Now, let’s make it easy for potential partners to slide into your DMs. Share your deets—full name or brand name, contact info, website URL, and social handles.

3. Describe Your Content:

Clearly lay out what type of content you create so a brand/company can quickly assess if you’ll be compatible for what they’re looking for. Whether you’re a master storyteller on YouTube, a meme connoisseur on TikTok, or a podcast prodigy, let ’em know what you bring to the table. 

You’ll also want to highlight your top-performing content pieces, from viral videos to blog posts that broke the internet. Don’t be afraid to flaunt your creativity and show potential partners what sets your content apart from the rest.

Example (for a beauty vlogger):

I’m your go-to for all things beauty and makeup, and share my tips and tricks on TikTok (1.1 M followers), YouTube (56K subscribers), and Instagram (28K followers).

My Top-Performing Content:

10-Minute Makeup Transformation (YouTube): This video gained 2.3 million views and shows how I apply my makeup when I only have 10 minutes. 

Quick 5-Minute Makeup Tutorial (TikTok): This viral video got over 3 million views on TikTok and shows how to apply a full face of makeup with limited products and time. 

What Sets Me Apart:

Unlike many beauty influencers, I prioritize authenticity over perfection. I’m not afraid to showcase my imperfections and provide genuine, relatable content that resonates with my audience. No filters, no facades—just real beauty, inside and out.

4. Provide Audience Insights:

Your audience is extremely important to potential partners. They want to know who’s vibing with your content, and see if it makes sense with what they’re selling. 

So, spill the tea on your following’s age, location, interests, and what makes them tick. Whether you’re catering to Gen Z gamers, millennial moms, or beauty enthusiasts of all ages, paint a picture of your loyal squad and why they can’t get enough of your content.

Example (for a gamer):

Our squad is a vibrant mix of gamers from all walks of life, but the core crew tends to fall in the 18-34 age range. We’re talking about serious gamers and tech buffs who are all about staying on top of the latest gaming trends, reviews, and tips.

As for the gender breakdown, it’s about 70% guys and 30% girls hanging out with us. But guess what? We’re seeing more and more awesome ladies joining the fun every day! Our community isn’t bound by borders either—we’ve got gamers tuning in from all over, whether they’re chilling in North America, Europe, or kicking it in the Asia-Pacific region.

We connect with our peeps across platforms like Twitch, YouTube, and Discord, where we dive deep into gaming culture, live streams, and epic esports showdowns.

5. List Out Engagement Metrics:

Let’s talk numbers, baby! How’s your engagement looking? Drop those digits—website traffic, followers, likes, comments—all of it! Show ’em you’re not just talking the talk but walking the walk with those sky-high engagement rates.

Example:

YouTube:

  • Subscribers: 100K
  • Average Views per Video: 40K
  • Engagement Rate: 10%

TikTok:

  • Followers: 500K
  • Monthly Likes: 640K
  • Average Likes per Video: 10K
  • Average Comments per Video: 90

Instagram:

  • Followers: 200K
  • Engagement Rate: 15%
  • Average Likes per Post: 2K
  • Average Comments per Post: 45

6. Show Off Previous Partnerships:

Time to flex those collab muscles! Share your previous partnerships, collabs, and sponsored gigs. Name-drop those big-name brands you’ve been strutting your stuff with. Whether it’s rocking the latest makeup from Sephora or repping those must-have sneakers from Nike, let ’em know who you’ve been cozying up to.

Showing who you’ve worked with can up your credibility and make you more desirable to other brands. 

Example (for a lifestyle content creator):

  1. FabFitFun (January 2023 – Present): Teamed up with FabFitFun to showcase their seasonal subscription boxes, featuring unboxing videos and product reviews. Our collaboration has garnered over 500K views on YouTube and sparked lively discussions on social media.
  2. Urban Outfitters (May 2022 – September 2022): Partnered with Urban Outfitters for a summer style campaign, showcasing their latest fashion trends and lifestyle products. Our collaboration resulted in a 18% increase in engagement on Instagram and drove traffic to Urban Outfitters’ website.
  3. HelloFresh (October 2021 – December 2021): Collaborated with HelloFresh to share easy and delicious meal prep ideas with my audience. Our partnership led to a 25% increase in engagement on TikTok and boosted brand awareness for HelloFresh among my followers.
  4. Peloton (March 2021 – July 2021): Teamed up with Peloton to promote their fitness equipment and digital workout classes. Through sponsored workout challenges and motivational content, we saw a 20% increase in engagement on Instagram and drove conversions to Peloton’s website.
  5. Airbnb Experiences (August 2020 – December 2020): Partnered with Airbnb to explore unique travel experiences and destinations. Our collaboration inspired my audience to book Airbnb Experiences, resulting in an 8% increase in bookings and positive feedback from participants.

7. Keep It Fresh:

Update your media kit regularly with all the latest and greatest about your brand. After all, you’re always evolving, so why shouldn’t your media kit? Try updating it every month to make sure you keep your metrics and content hits as recent as possible. 

Where to Put Your Media Kit

Alright, so you’ve got all this awesome content ready to showcase, but now you’re wondering: “How do I lay it all out in a way that’s gonna grab attention and keep ’em hooked?” 

Well, your media kit needs a home—a digital hub where it can shine like the superstar it is. The best place to put your media kit is on a dedicated landing page on your website. 

Now, let’s talk design. Your landing page should be sleek, stylish, and totally on-brand. Show off your personality and vibe from the get-go, so visitors know what they’re in for if they partner with you.

Next up is organization. Break your content down into bite-sized chunks—think sections like “About Me,” “Content Showcase,” and “Collaboration Opportunities.” Each section should be easy to navigate, with clear headings and plenty of visual flair to keep things interesting.

And don’t forget those calls to action! Whether it’s inviting visitors to reach out for collabs or encouraging them to explore more of your content, make sure there’s always a next step for them to take.

That’s it!

So, there you have it—your guide to slaying the media kit game like a true content queen (or king). Now go forth, dazzle those potential partners, and make your content dreams a reality! You’ve got this!

Categories
Creator success Design tips Launching products Promoting merch

7 Ways to Earn More Money on Spring

Spring makes it easy for you to create products and make money selling them. However, many of our users struggle to make even one sale. If that’s you, or you believe you’re not getting as many sales as you should, don’t sweat it! Check out the steps below to learn the secrets to creating and selling like a boss on Spring!

1. Design Graphics Tailored to Your Following

Your fans are your biggest supporters–and who you’re selling your products too,–so make them the inspiration behind your designs. Center your creations around those special moments from your content that your fans know and love—the funny jokes, the memorable quotes, or even your beloved sidekick, like your pet. Let your designs reflect the vibe of your community, with a playful touch that only your true fans will appreciate.

If you’re stuck on what to make, take advantage of your social media fam by running polls or surveys to get their input directly. Find out what designs they’re vibing with, what gets them excited, and let their feedback guide your creative process.

And if you’re looking for some extra design mojo, dive into the world of AI design tools. Check out these three free platforms:

Canva: 

Canva is a great beginner tool with an easy interface that makes designing images and text easy to do. It also offers a new AI feature where you can request specific images to be created for you.

Pixlr: 

Whether you’re a newbie or a pro, Pixlr’s AI-powered tools have got you covered. From basic edits to cool effects that’ll make your designs pop, Pixlr makes it easy to bring your vision to life.

Gravit Designer: 

Try vector design with Gravit Designer’s intuitive features and AI-driven capabilities. With powerful tools at your fingertips, you’ll be creating captivating designs in no time.

With these tools in your arsenal, you’ll be whipping up designs that speak directly to your audience, paving the way for a merch launch that’s as unique as you are.

2. Pick the Perfect Products

When it comes to choosing products for your designs, think about what your fans would actually want to snag. If you’re a gaming creator, consider slapping your designs on desk mats, phone cases, and other cool tech gear. Or, if you’re more into the fitness scene, try leggings, sports bras, or water bottles. You want to make sure you cater to your audience’s interests.

You’ll also want to keep the seasons in mind. When the chilly weather rolls around, cozy hoodies and long sleeves are a must-have. But when the sun’s shining, tank tops and board shorts are where it’s at. 

Need some inspo? Check out all our hot sellers right here.

3. Keep the Launch Party Going

Spring gives you the green light to launch as many products as your heart desires. Why? So you can experiment, of course! Test out different designs and product types to see what gets your followers buzzing. And hey, if something doesn’t quite hit the mark, no sweat—you can easily unlist it and move on to the next big thing.

But here’s where the magic happens: Take note of what works and what doesn’t. What designs have your fans raving? What products are flying off the shelves? Use that golden info to fine-tune your strategy for future launches and keep the good vibes rolling.

4. Highlight Your Hottest Hits

Give your best sellers the spotlight they deserve and make them easier for your fans to find on your storefront.

Here’s how to place products at the front of your store:

  1. Click on Stores on the left-hand menu.
  2. Select Edit Store
  3. Click Products
  4. From there, you can star any products you want to feature at the top of your store. 

5. Order Samples and Use Them in Your Content

Using samples in your content can increase your sales by 300%! So get your hands on some samples of your products and incorporate them into your content strategy. Whether it’s unboxing videos, photoshoots, or giveaways, showing off your products in action can drive interest and sales. 

You can order samples here!

6. Spread the Word on Social Media

Once you have your designs and products live, it’s time to turn up the volume on your socials and get the word out about your awesome merch! Hit up all the platforms where your fans hang out and start showing off your awesome products.

Whip up some eye-catching social graphics and videos that showcase your products in all their glory. Talk ’em up, show ’em off—whatever it takes to get your fans excited to hit that “add to cart” button.

Also, don’t forget to drop your store link in your bio to make shopping for your products easy, as well as add our social integrations

7. Reach Out with Email Campaigns

Email campaigns are a great way to boost sales and keep your fans engaged/aware of your new drops.

If you have an email list, use it to share exciting updates about your latest merch drops, exclusive deals, or behind-the-scenes peeks into your creative process. With the right message, you’ll have ’em hitting that “buy now” button in no time.

If you don’t have access to an email list, but have gotten a lot of sales, reach out to us at creatorsupport@spri.ng. We’ve got your back, and we’re here to help you make magic happen.

Now Go Start Earning!

Our platform is designed to help you earn with ease, and with these tips in mind, you can become unstoppable! 

Follow us on Instagram, Facebook, or Twitter for weekly tips and tricks on how to succeed on Spring!