Just announced: we’re going to Vidcon! Vidcon will run through Wednesday, July 10th – Saturday, July 13th in Anaheim, California. Join your favorite creators and thousands of other attendees enjoying live panels, Q+A’s, live performances, and major brand announcements. As an official sponsor of Vidcon 2019, we’ll be hosting our own “sponsored session” discussing our top recommendations for selling merch while staying true to your audience.
“The secrets of selling merch, without selling out”
How do you create and sell merch without looking like a self-absorbed “influencer”? Learn from industry experts and creators who are crushing merch sales by creating custom products their communities love. Getting started with merch on Teespring is totally free, so whether you have 10 or 100,000 followers, you will leave the session with the know-how to create and sell awesome merch in minutes.
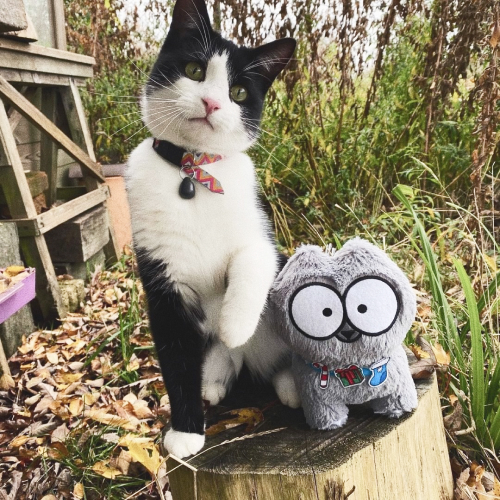
We’ve simplified the process to help you source and sell custom plushies seamlessly with TeespringGo. Check out the video below to see how easy it is to design and sell your very own plushie with Spring.
Our team will help you design your prototype and source inventory using the option that works best for you. We’ll also handle inventory storage, listing creation, order fulfillment + delivery, and customer support too.
How to create the perfect plushie
Learn more about each customization option below. Keep in mind, you can also request custom add-ons to your plushies (ex. accessories, collars, collectables, etc.) when you submit your request.
Concept
Before submitting a request you should have a clear concept of the plushie you want to create. The more details you provide the better. In most cases, creators will submit a design file (EPS or PNG) along with a graphic that illustrates what they want the plushie to look like once created. In this example we can clearly see the size, resting position of the plushie, colors, etc.
Example of an image featuring product specifications that should be submitted with a request
Stuffing + material
Most plushies are constructed using a soft velour/velboa plush material and stuffed with a special hypo-allergenic polyester material, which makes them super huggable! It is also possible to use beans (100% propathene) to stuff your plushie. Our team will recommend the best stuffing and material options available to help you achieve the overall look you’re going for.
Resting position
We can create plushies in any position. The most common positions are standing, sitting or laying. We may recommend a certain stuffing option in order to achieve the position you want.
Size
We can create any plushies in size. The most common range is between 6 to 16 inches. Keep in mind anything larger than 16” will incur more transport costs from production and increase shipping costs for fans.
Eyes & nose
Choose the eye and nose options best suited for your plush—we offer embroidery or plastic. Please note the use of plastic will lengthen prototype turnaround time by 1 – 2 weeks due to safety test requirements. We are not able to use additional plastic, metal or wire materials in other areas of plushies due to safety concerns.
How to sell custom plushies
Here’s a breakdown of how the process works once you’ve designed your plushie.
1. Submit request
Fill out the form with your plushie characteristics and submit your request. We aim to process all requests within 24 – 48 business hours.
2. Approve quote & prototype
Once we receive your submission we’ll send you a non-refundable deposit payment link for $250. This deposit will go towards the prototype cost and any leftover funds will go towards inventory costs. Once the deposit is paid we will process your request and follow up with a prototype mockup and quote for approval. It’s important to note that the quote includes inventory transport costs and the cost of safety certifications required to sell your plushie.
Once you approve the prototype* mockup and quote it can take up to 30 calendar days for the prototype to be created and shipped to you. *Please note if you require multiple prototypes due to design modifications this may require additional payment if the $250 does not cover the cost of all additional prototypes.
3. Source & sell
You have two options for sourcing and selling plushies.
Option 1: Pay for inventory upfront
When you approve the prototype the next step is to pay for the full inventory order (minus what’s left of the deposit). Once full inventory payment is received your plushie order will be processed and we’ll confirm the estimated delivery time for your plushies to reach our facility. Depending on the quantity of plushies, inventory will arrive within a few weeks or months. Please note we also recommend ordering an additional 5% of inventory for replacements and exchanges.
One inventory reaches our facility we’ll take product photos and create the plushie listing for you. We’ll make sure to set the listing to ‘private’ so you can make it public and start selling when you’re ready. You can sell your plushies until stock runs out.
Option 2: Run a pre-order campaign
The pre-order option is there for creators who are unsure how much inventory to order or would like to avoid paying for inventory out of pocket. This enables you to avoid the risk of sourcing too much inventory or having to pay thousands of dollars for the products upfront.
After approving the prototype, you’ll need to confirm the minimum order quantity (MOQ)—i.e. the minimum number of plushies you plan to sell. Note the MOQ must be at least 100 units.
Next, we’ll create a pre-order landing page for fans to reserve their plushie. Pre-order campaigns usually run two to four weeks.
We’ll inform your community of the estimated delivery timeline for their order on the landing page and within confirmation emails. We’ll also advise them of the minimum order quantity on the landing page so if the MOQ isn’t reached they’ll understand why their order is canceled.
After the pre-order period ends (and MOQ is reached), we will use the funds from plushie reservations to pay for the inventory. Please note we also recommend ordering an additional 5% of inventory for replacements and exchanges.
Depending on the quantity of plushies, inventory will arrive within a few weeks or months. At that time we’ll send the orders to your buyers. Once orders are dispatched your profit will be available for withdrawal.
Please note, if you do not achieve the minimum order quantity required by the end of the selling period, all orders will be cancelled and buyers refunded.
4. Get Paid
After all plushie orders are shipped to buyers, profit from sales will be available for withdrawal within your Spring account.
Pricing recommendations
Normally a plushie’s base costs range from $6 – $12 but keep in mind there are many factors that can impact price like the combination of size, accessories, materials, etc. Also, any custom add-ons you request (outside of what is available in our catalog above) will increase the base cost of your plushie.
You will decide how much profit you want to make per plushie. The most common plushie selling prices range between $15 – $30. Teespring charges a fulfillment fee which covers storing plushie inventory (up to 60 days from last sale), creating product mockups, fulfilling orders, and handling customer service for you. Our service fee is 15% of the selling price (minimum $2). Pricing should depend on the base cost of your plushie and how much you think your audience will pay for this custom product. Let’s look at an example of how much profit you could make selling plushies:
For example, you source 1,000 plushies with a base cost of $10 each.
You pay $10,000 total for the full inventory order.
The selling price for each plushie is $25.
Teespring’s fulfillment fee is $3.75 (because 15% of $25).
Therefore, your profit margin would be $25 (selling price) – $10 (base cost) – $3.75 (service fee) = $11.25 per plushie.
This means you’ll make $11,250 in profit once you sell all your inventory.
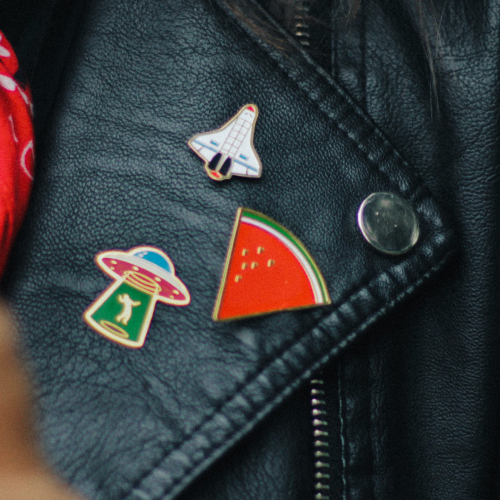
Creators can’t get enough custom pins! We’ve simplified the process to help you source and sell custom pins as quickly as possible with Spri.ng. Check out the content below to learn how easy it is to design and sell your very own custom pins.
Don’t forget pins cannot be produced on demand. This means you will pay for inventory upfront before your listing is created. Spring will handle inventory storage, listing creation, order fulfillment + delivery, and fan support too. All you need to do is design your pin, purchase inventory, and start selling—we’ll handle the rest!
Part 1: Design the perfect pin
First choose the type of pin you want to create.
Soft enamel: Soft enamel is our most popular pin type. Its defining characteristic is having colored paint recessed into the metal mold—giving the pins a dimensional look and textured feel people love. These pins are a great option if you’re using simple designs with five colors or less.
Hard enamel (Cloisonne’): Hard enamel pins feature enamel that is polished flat across the design surface. They’re produced by adding and baking each individual color separately on the pin. After all colors are added, the pin is polished to achieve its iconic smooth finish. These pins are a great option if you’re using simple designs with five colors or less.
Offset printing with thin epoxy coating: Offset printed pins are perfect for detailed designs because they do not alter or distort the image. This type is also recommended if your design features text, gradient effects, or lots of colors. Designs are printed onto the pin surface and a clear epoxy resin is applied over the imprint. This protects the image surface from scratches and damage.
Offset printing with thick epoxy dome: This product is very similar to offset printing with thin epoxy coating, the main difference is the clear epoxy resin is applied multiple times, creating a thicker, dome-like shape over the design for additional protection.
3D Mold: 3D mold is ideal for creating striking, three dimensional pins. This pin type offers depth of detail with multiple surface levels at multiple angles to create a three dimensional look and feel. It’s best for designs of animals, objects, shapes, etc. Please note 3D mold pins cannot feature any custom colors—the color of the pin is based on the finishing you select.
Die struck: Die struck pins use raised and recessed metal to create your design, just like a coin. Die struck pins begin as a simple sheet of metal plating, then a custom die is created for your design and stamped onto the metal leaving the design impression on the sheet. The recessed areas are sandblasted to add contrast and bring out design details. Please note die struck pins cannot feature any custom colors—the color of the pin is based on the finishing you select.
Design files
We can accept JPEG, .JPG, .PNG, .AI, .EPS,.PSD, .TIFF and .PDF design files. We recommend submitting high resolution files (300 DPI) with at least 2.5” x 2.5” (750 x 750 pixels) dimensions. If you’re not able to submit a design file through the form you can provide a design link in the comments section of the form instead. Keep in mind the design concept you submit should reflect the pin type you choose—for example, a simple design works better with soft enamel pins while detailed designs with text work best with offset printing.
When creating designs intended for offset printed pins we recommend using CMYK color system.
When creating designs intended for enamel pins we recommend using RGB / Pantone color system.
Design file, PNG format, 750 pixels (2.5″) long and 300 DPI
Example: In addition to the design file, you can also specify measurements and color codes
Choosing a size
The 1 inch option is the most popular size selection, however if your design features text or lots of details we may recommend choosing a larger size. Keep in mind the larger the pin size the more the base cost increases.
Finishing
Teespring offers 16 different finishing options. See the table below for compatibility options based on pin type.
Backing
The butterfly clutch is the most common pin backing option. We also offer a black rubber clutch or traditional safety pin backing too. Keep in mind the safety pin packing is best for pins that don’t need to be removed and/or reattached often, but this option is considered an add-on and will increase the base cost.
Packaging
You can choose between two packaging options. The clear plastic bag is the most popular and affordable option and each pin is individually packaged in a poly bag for protection. The second option is the 3″ x 3″ custom backer card which is ideal if you’re interested in additional branding. If you select this option you’ll also need to submit a backer card design (288 x 288 pixels with 300 DPI). You can choose between glossy or matte finish for your backer cards too. Please also note backer cards are an add-on feature that will increase the base cost of your pin order (around $0.90 extra per unit if you order 1k pins).
Pricing reference + add-ons
Below is a price reference table. This is an example of price ranges for soft enamel pins with 5 colors and no add-ons. Please note these prices are not exact—they simply provide an indication of price range. Pin type, number of colors, size, etc. will determine the base cost. Your pin’s base cost may be slightly lower or higher than the table below depending on the characteristics you choose.
Add-on characteristics that can increase the base cost of your pin include:
6+ colors: adding six or more colors to soft and hard enamel pins
Glitter/Glow paint: Glitter and glow in the dark paint are available for hard and soft enamel pins
Engraving: You can add custom engravings to the back of all pins
Shiny silver: The shiny silver finish incurs additional cost.
Size: selecting sizing above 0.5 will increase the base cost
Backing: safety pin backing is an add-on
Packaging: backer cards are a custom add-on
Part 2: Sell custom pins
Here’s a breakdown of how the sourcing process works.
1) Submit request
Fill out the form with your pin characteristics and submit your request. We aim to process all requests within 24 – 48 business hours.
2) Order inventory
Once we receive your submission we’ll send you a deposit payment link for $50. Once the deposit is paid we will process your request and follow up with an exact quote and product mockups. When you approve the pin mockups and quote we will send you another payment link for the total inventory cost (minus your deposit). Once full inventory payment is provided your pin order will be processed.
3) Start selling
Pin production takes around 30 business days and inventory will be sent to our facility in the US. We’ll create product mockups for you and make sure to set the listing to ‘private’ so you can make it public and start selling when you’re ready. We can also send pins to you if you’d like to create promotional material or videos for the launch.
Pricing recommendations + fees
You decide how much profit you want to make per pin. Keep in mind Teespring charges a service fee which covers storing pin inventory (up to 60 days from last sale), creating product mockups, fulfilling orders, and handling customer service for you. Our service fee is 15% of the selling price (minimum $2). Normally pin retail prices range from $7 – $15. Pricing should depend on the base cost of your pins and how much you think your audience will pay for this custom product.
For example, you source 1,000 pins with a base cost of $1.40 each. You pay $1,400 total. The selling price for each pin is $9. Teespring’s fulfillment fee is $2. Therefore, your profit margin would be $9 (selling price) – $1.40 (base cost) – $2 (service fee) = $5.60 per pin. This means once you sell all your pins you keep $5,600 in profit.
After a successful launch and $1M investment in the UK creator space, we’re setting our sights on further global growth. We want to bring the power of YouTube’s Merch Shelf to creators worldwide!
In 2019 Teespring will strengthen its presence in Canada, Australia, Germany, France, Italy, Spain, the Netherlands, Portugal, Ireland, and Belgium in tandem with the expansion of YouTube’s Merch Shelf. We’ve teamed up with Famebit to create quality video content and spread the word about the Merch Shelf going global!
Are you on Famebit?
We’re calling all creators to check out our campaign and apply. We’d love to feature your video content in our marketing campaigns and help raise awareness that this tool is available to creators worldwide.
If you’re not on Famebit and/or already have video about your merch let us know. We’re looking to feature your video on Teespring’s social media and advertising channels.
Merch Shelf in action
See how other creators are using the Merch Shelf to monetize their channels and connect with fans in the videos below. Learn how you can partner with Teespring and access this powerful tool today—visit the official Merch Shelf website now.
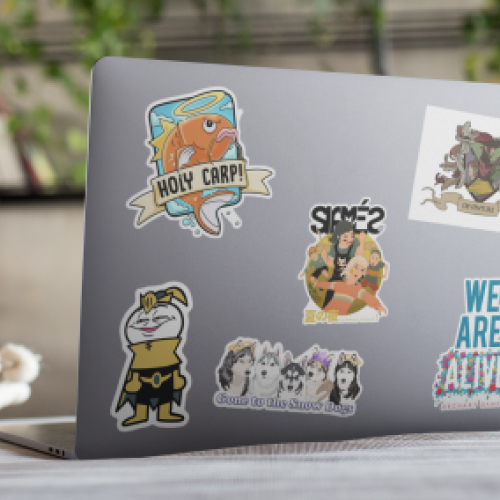
Now you can create totally custom die cut stickers instantly in the Teespring Launcher. Die cut stickers feature calendared vinyl with pressure sensitive adhesive and a glossy white finish for the highest quality look and feel. Their durable vinyl finish protects your designs from scratches and moisture too. Virtually any shape is possible thanks to our Swiss precision cutting technique. Add this product to your Teespring listings and start selling now!
Pricing
The base price is just $3.50 no matter what size or shape your sticker is. Stickers sell best within the $4.99 – $7.99 price range.
Product Details
With the largest size offering in the business, you can create truly unique and original sticker designs to stick…wherever you like! Teespring’s vinyl stickers are printed using high-definition Inkjet technology.
Up to 5” x 5”
6 mil calendered vinyl
Glossy white finish
Pressure sensitive adhesive
Printed on white vinyl
Design File Tips
We recommend using high quality PNG files with transparent background (300 DPI)
Up to 5 inches x 5 inches
We add a 1/8″ white border around the artwork
White design elements should be outlined in another color
All objects placed on the launcher will be combined into one sticker
How to Create Die Cut Stickers
1) Upload design
Head to the Teespring Launcher and click on the “Die Cut Sticker” icon. Next upload your design. We recommend using high quality PNG files (300 DPI) with a transparent background. Keep in mind we’ll add a ⅛” white border around the design, so we don’t recommend using white design elements without a colored outline.
Die-Cut Sticker icon in the Teespring Launcher.
2) Adjust size
Stickers can be up to 5”x5” in size. You can adjust your sticker size in the launcher and see the exact dimensions as you edit. Switch to the “preview” tab to see what it will look like when printed.
3) Launch
Don’t forget stickers sell best within the $4.99 – $7.99 price range. After saving your edits, you can add additional products to your listing. Once you’re ready, edit your title, description, and launch.
On Spring, there are an array of speciality products, custom product sourcing (ex. pins and plushies) and fulfillment services available to unlock.
Our specialty on-demand products include products such as all-over print hoodies, crop tees, zip hoodies, sports bras, hats, swimsuits, backpacks, duffle bags, and more. Our goal is to incorporate these products into the launcher for everyone to access, but until then, we are giving access to users on a case by case basis.
Once you are eligible to create these types of products, they will become visible in the launcher.
Increase your sales
Because requests are processed manually, we want to ensure that creators receive the fastest launch turnaround time possible. To do this we have limited access to users with a proven sales history. Therefore, the more sales you make, the more products you can unlock in the launcher. Please note, you also need to comply with Spring’s design policies.
That’s it!
Once you’ve unlocked specialty products you’ll see them in the launcher.
Not only are payouts be simplified thanks to our guaranteed profit system, but our integration with Boosted Network enables our team to heavily invest in Search Engine Optimization (SEO) and Search Engine Marketing (SEM) too. We have already hired new team members to focus on generating growth through SEO and SEM—two extremely effective tools for driving sales.
Please note: From 10/13/2021, we decided to shift resources towards new initiatives that will help creators increase their sales while enhancing their unique brand. We’ll have more news around these new initiatives soon so watch this space.
Simplified profit structure
In the past, marketing on the platform has been comprised of 3 different elements: marketplace, email marketing, and paid promotion. Each element had its own CPO (cost per order), which creates a confusing experience for creators. This merger allows us to simplify payouts and analytics for Spring driven sales—now your sales will appear as either ‘Direct’ (driven by you through organic promotion, ads, etc.) or ‘Boosted Network’. Sales from the Boosted Network will be shown in the Analytics section of your dashboard.
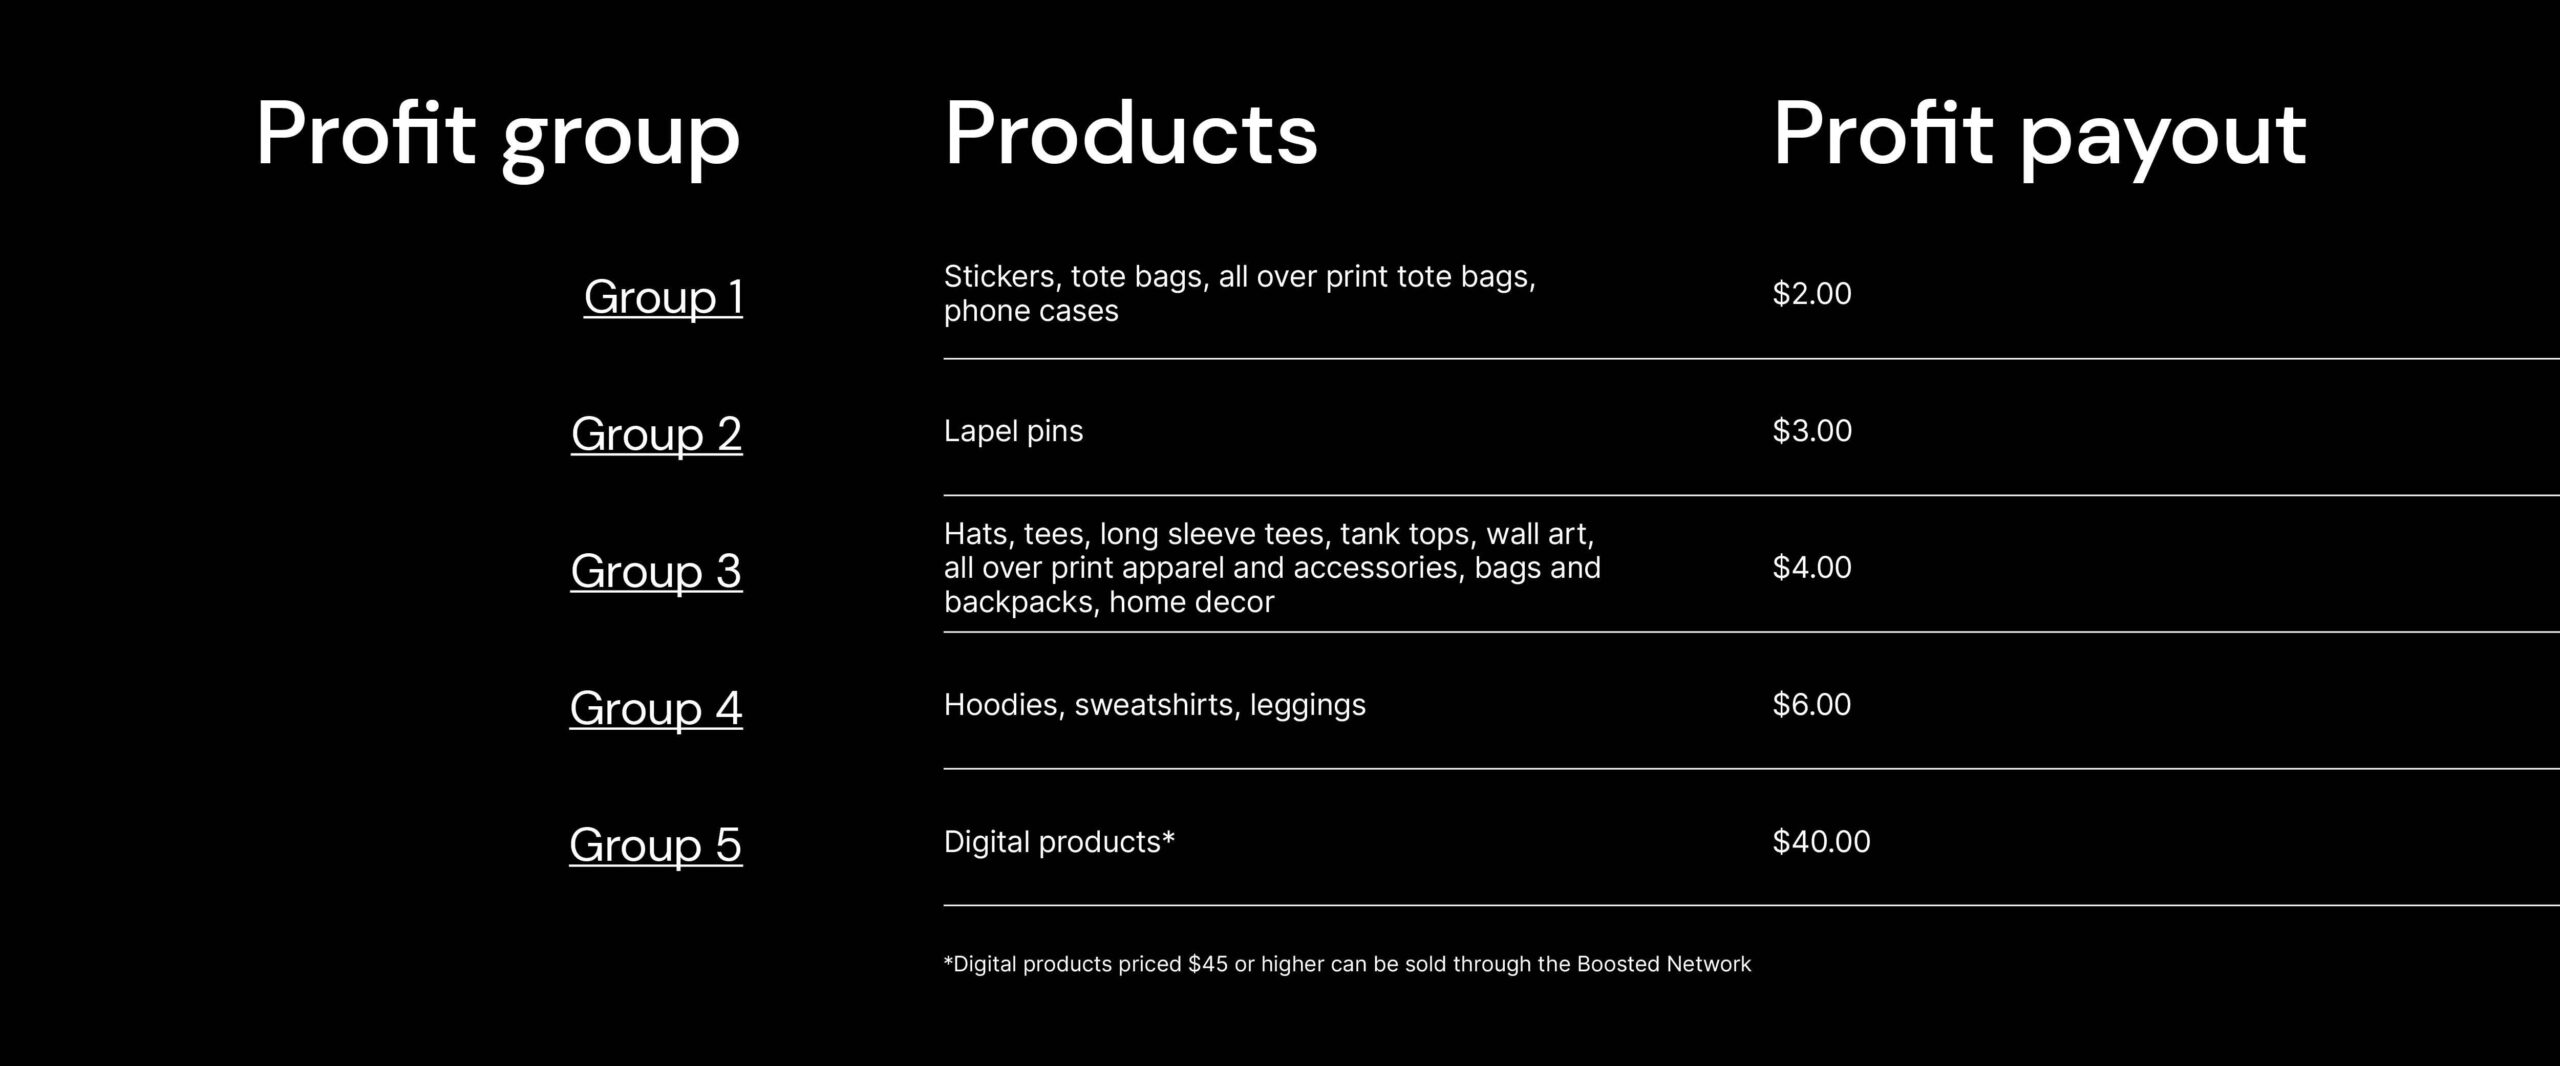
You’ll receive the guaranteed profit amount per product based on the category it belongs to. There’s only one exception to this rule—if you set your profit too low. If your profit margin is lower than the guaranteed profit amount, then you’ll receive the profit margin you’ve set. Therefore, we recommend making your selling prices above the guaranteed profit amount—this means setting your selling price for small accessories to $2+ profit margin, tees and home decor to $4+ profit margin, and all-over print products and sweatshirts to $6+ profit margin.
Prioritizing SEO & SEM
We’ve invested heavily in driving more sales using SEO and SEM. By having members of the team to support these efforts, we’re confident this will drive more sales. Creators who are concerned about reduced profit margins due to the new profit structure should come out on top with an increase in overall sales and higher profits on products like mugs, stickers, totes and phone cases.
Get your products in front of more fans with the Boosted Network. If you’ve opted in, we may feature your products in ads across Facebook, Instagram, and Google.
What is the Boosted Network?
Over the years, the Boosted Network has evolved as we strive to become the no.1 destination for creator commerce. Recently, we’ve scaled back on featuring listings on marketplaces (such as Amazon, Wish and eBay) and focused on promoting listings through SEM and retargeting ads on Google, Facebook and Instagram.
How can I add my products to the Boosted Network?
You can opt-in to feature your listings via your dashboard settings. The selection of Boosted Network content is based on an algorithm. In order to ensure your products are eligible, you should:
Products with at least one sale are automatically prioritized for the Boosted Network.
How much profit can I make per sale?
It depends on the product. Please refer to the table below to see how much profit each item generates when sold through the Boosted Network.
Please note: products with profit margin lower than the payout profit amount listed below will not be boosted. For example, a mug with a profit of $1 would not be eligible to be sold on the Boosted Network.
Can I sell digital products on the Boosted Network?
Yes, but please note only digital products with a selling price of $45 or higher are eligible to be sold through the Boosted Network. The profit for digital products sold through the Boosted Network is $40.
Can I opt out?
Yes, you can opt-out within your dashboard settings.
How do I see profits generated through Boosted Network?
Any products sold through the Boosted Network will be labeled as such. You can also see your total Boosted Network sales within the “Source of Units” section of your account analytics or within an individual listing’s analytics.
Do Boosted Network sales count towards my monthly pricing discount?
Yes they do count towards your monthly sales count. Just keep in mind products sold through the Boosted Network will not receive the pricing discount.
We take your safety and security very seriously. A lot of work goes in behind the scenes to help keep you and your personal brand safe. This feature allows you to add an extra layer of security: two-factor authentication using Google Authenticator.
Make sure to download the Google Authenticator app (available for both iOS and Android devices)—the app is necessary to set up two-factor authentication.
Please read through the instructions below before activating two-factor authentication; if you skip step 3 you’ll lock yourself out of your account. If you get locked out of your account you can contact creatorhelp@spri.ng for assistance.
1. Download the Google Authenticator app
Download the Google Authenticator app onto your mobile device from either Google Play (Android) or The App Store (iOS).
2. Update your Spring account settings
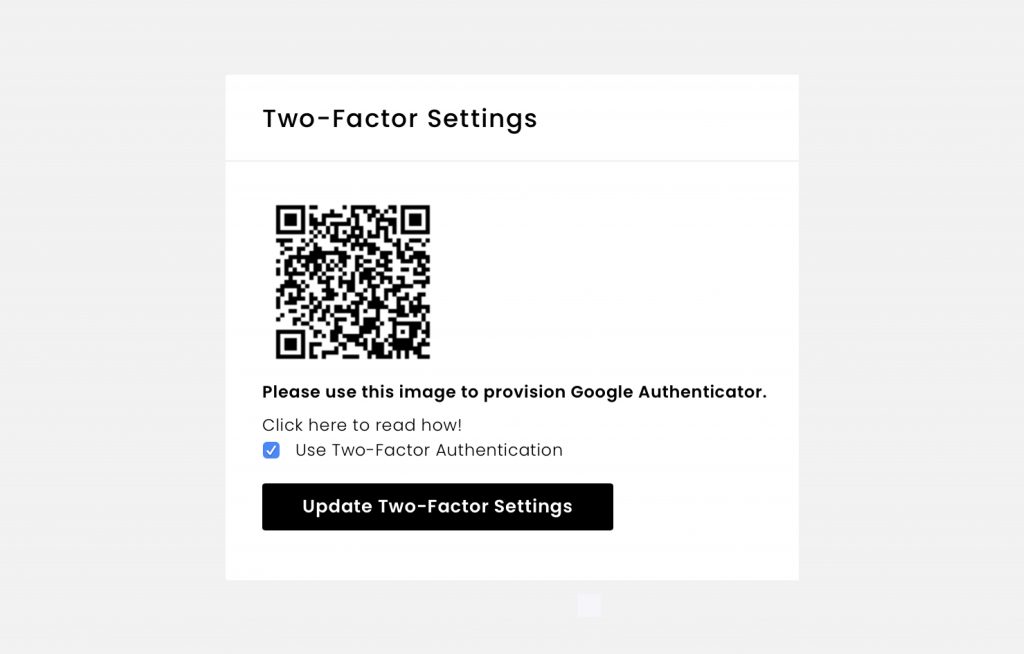
Log into your Spring account and go to the “Settings” section of your dashboard (using the same device or a computer). Scroll down to the bottom of your settings to the section called “Two-Factor Settings”. Check the box that says “Use two-factor authentication” and update your settings by clicking the button bellow the check box.
3. Scan the QR code provided
Next, use your mobile device to scan the QR code through the Google Authenticator app.
If this is the first time you’ve used Google Authenticator, select “Begin set-up”.
If you are adding a new account, choose “Set up an account” from the app’s menu.
Select “Scan a bar code” and scan the bar code shown on the settings section of your Spring dashboard.
After scanning, you will see an access token appear within the app. (this should be a series of numbers)
Note: if the Authenticator app cannot locate a barcode scanner app on your mobile device, you might be prompted to download and install one. If you want to install a barcode scanner app so you can complete the setup process, select install, then go through the installation process.
4. Add access token when you login to Spring
Now, logout of your Spring account and return to the login page. On the login page, select the option “Using 2 factor Authentication? Click here”. Enter your login details, as well as the access token generated in the Google Authenticator app.
Also note: You can use the same process on multiple devices if necessary (for example, if you use both a laptop and/or a desktop computer). Google Authenticator generates a new access token every 30 seconds—but you can use a different token on a different device as long as it’s associated with the same Spring account.
You may also want to consider downloading the Google Authenticator app on multiple devices—this way, you’ll still be able to get your account’s access token you lose your original device.