The holiday season brings more traffic, higher engagement, and major sales opportunities. Preparing your store now ensures you’re ready to make the most of it. These four steps will help your storefront look professional, stay on-brand, and convert more visitors into buyers.
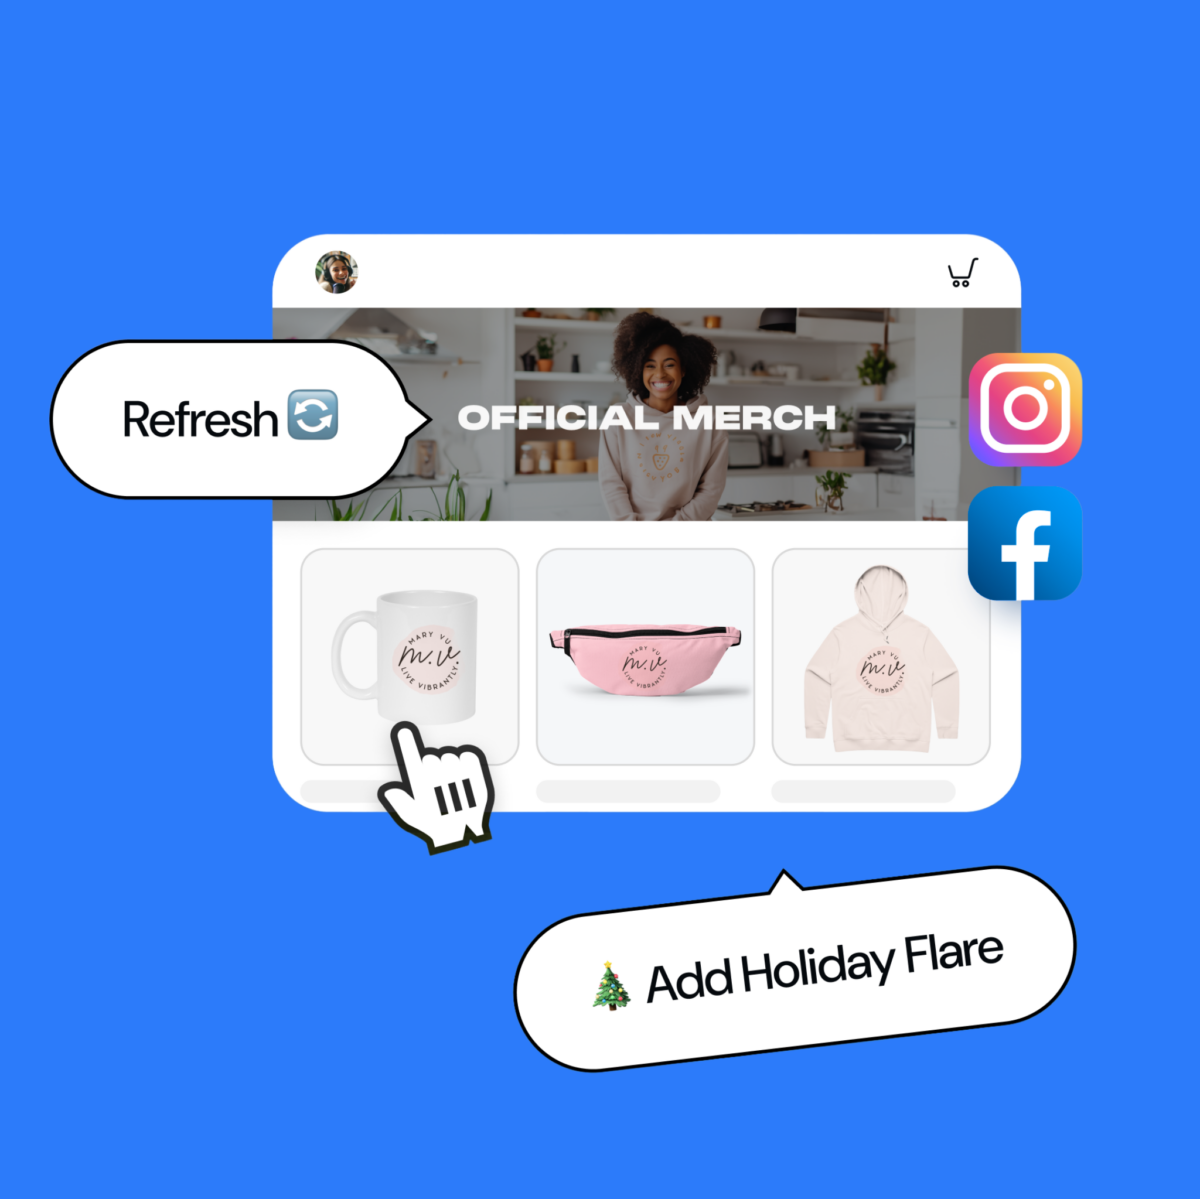
⚡ Step 1: Refresh Your Store
Featured products receive 58% more views and sell 20% more on average. Your storefront sets the tone for every visitor.
Update outdated messaging and highlight your best-selling products.
Reorder listings so holiday collections appear first.
Refresh visuals — consider adding a seasonal accent to your logo or color palette.
Feature key products by selecting the ⭐ icon in your Store Editor.
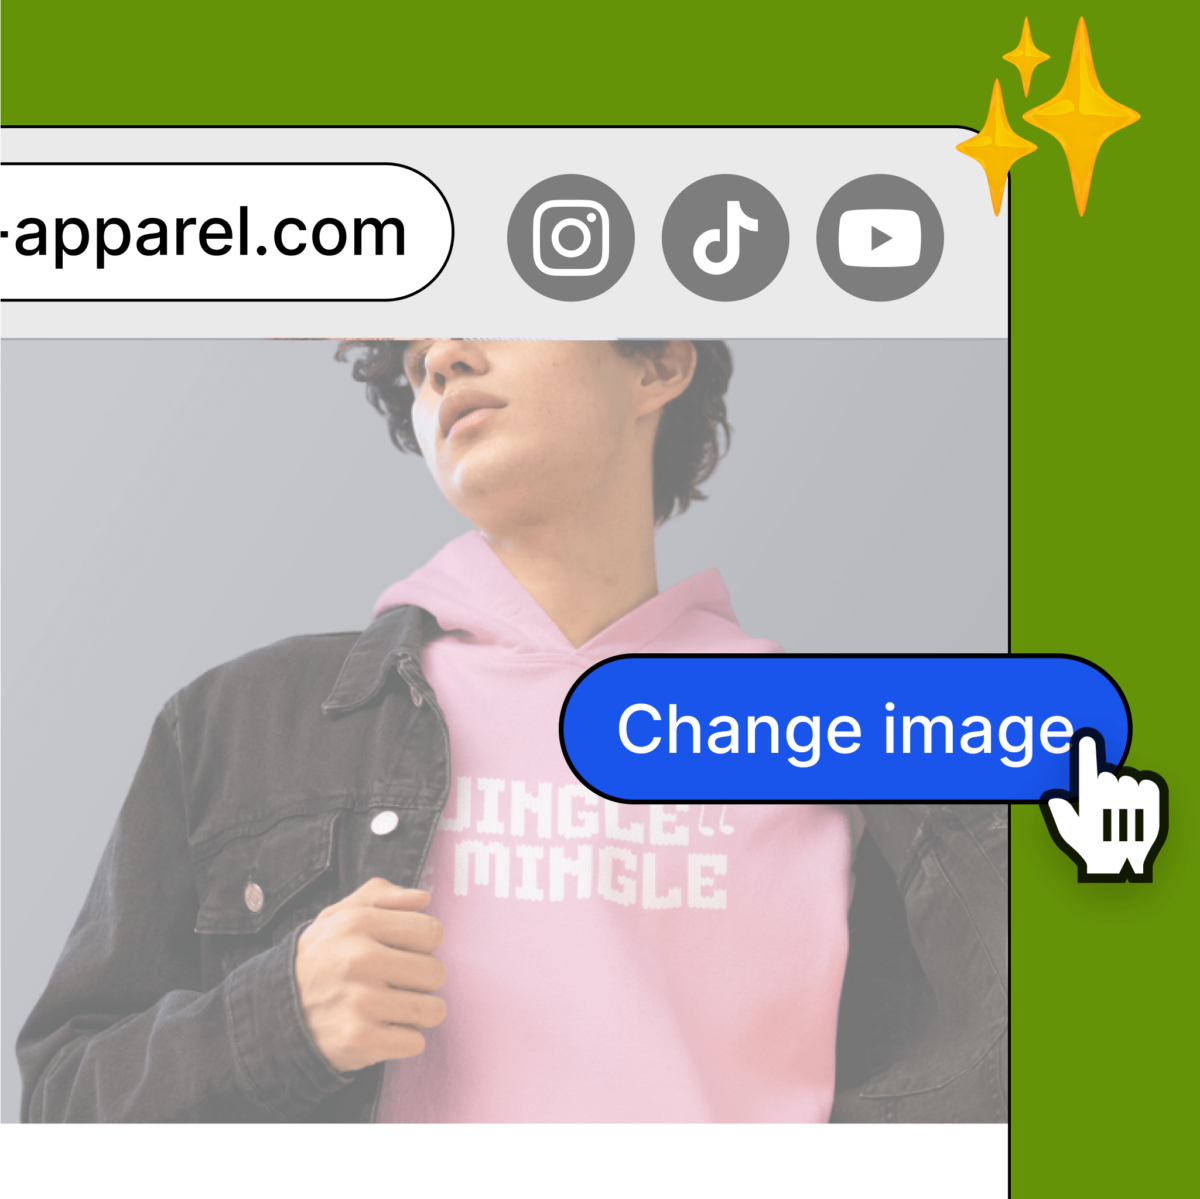
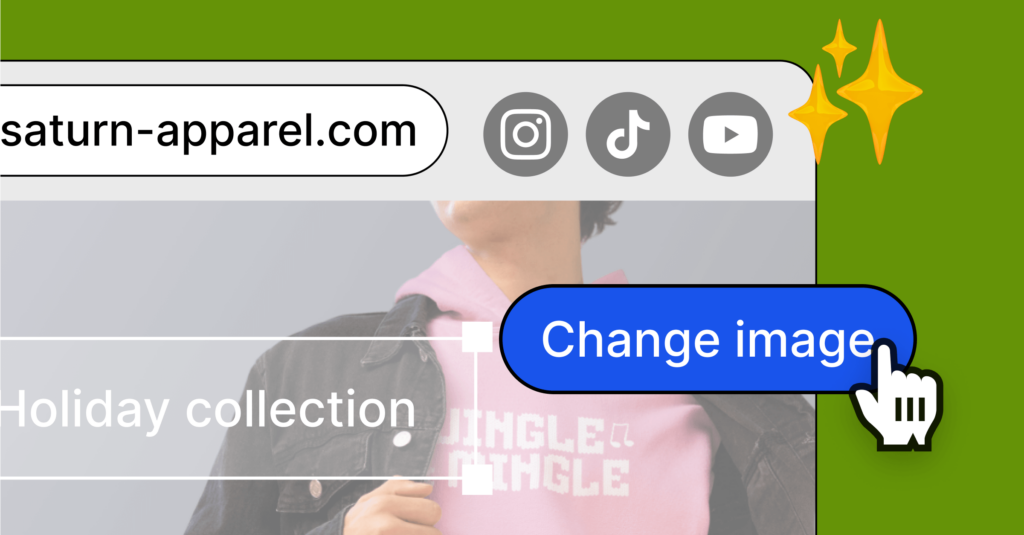
🖼️ Step 2: Update Your Banner
Your hero banner is the first thing shoppers see—it should capture attention instantly.
Add a clean, festive image that reflects your brand.
Tools like PlaceIt make it easy to create professional mockups in minutes if you don’t have your own images to use.
🎁 Pro tip: Use consistent tones and imagery that evoke your brand’s personality while staying seasonally relevant.
💅 Step 3: Strengthen Your Branding
Consistency builds recognition and trust.
Upload or refresh your logo (a subtle holiday variation works well).
Adjust navigation and footer colors to match your current aesthetic.
Ensure every visual detail—from fonts to backgrounds—feels cohesive.
✨ A polished, unified look can help drive credibility and repeat purchases.
🔗 Step 4: Connect Your Channels
Your audience should have a direct path from social media to your store.
Link your socials under Stores → Social Profiles.
Enable “Display Links” in both your navigation bar and footer.
Simplify your domain name to make it easy to find and remember.
📱 Fact: Half of consumers say a brand’s online presence directly impacts their trust and likelihood to purchase.
🎁 Keep the Momentum Going
Explore our Creator Advent Calendar — your daily guide to challenges, rewards, and expert tips designed to help you boost engagement and sales all season long.
Picture this: It’s mid-March. Your Instagram feed is suddenly full of spring content. Everyone’s launching their new collections… and your good idea is still sitting in your notes app, begging to come to life.
We get it — we’ve been there too! Between managing your business, creating content, and trying to maintain some kind of work-life balance, getting ahead with product creation is easier said than done.
At least, it was until this year. This year we’re doing things differently. 💪
As part of our 1% better campaign — where we supply you with weekly tips that are manageable enough to do in a few minutes, but which lead to massive results by December 31st — we want this to be your most prepared spring season yet. That’s why this month’s challenge is simple: get yourself set up for a stress-free and profitable spring campaign by letting go of the old, and bringing in the new.
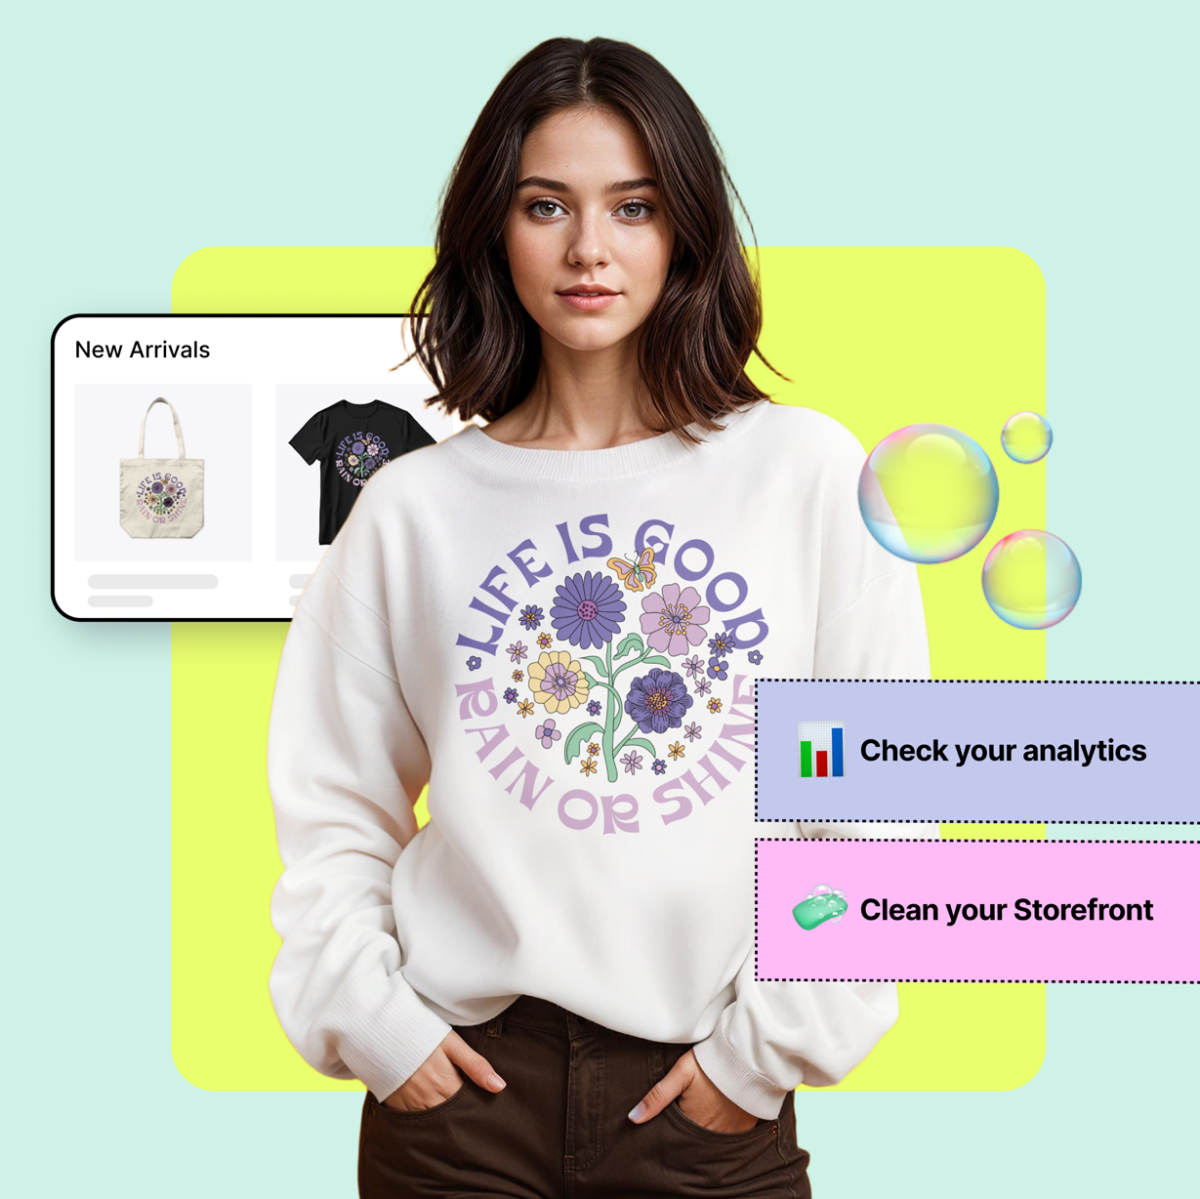
This Month’s Challenge: Do A Spring Cleaning of Your Storefront 🧽
Spring is when the world comes back to life, and this month your challenge is to breathe some new energy into your storefront. It’s time to throw open the windows, let in some fresh air, and get rid of the clutter that’s holding you back so you can make room for what’s new.
Here are some ideas on how to get started:
Dig Into Your Analytics And See What Works
The hardest part about a spring cleaning is working through all of the stuff you’ve collected along the way and choosing what to keep and what to release. Now’s the time to let go of the products that aren’t serving your vision anymore so you can create space for bigger, better things.
Unlike your attic or basement, your storefront has data to help you. Here are some tips on how to use the analytics inside of your Spring dashboard so you can make decisions based on data, not vibes. Then, sunset the products that are no longer sparking joy (but remember to thank them for their service — they helped you get to where you are now!).
Add New Products (Or Give Top Performers A Seasonal Twist)
Once you’ve let go of the old, it’s time to create a new line of products — or give your best-sellers a refresh.
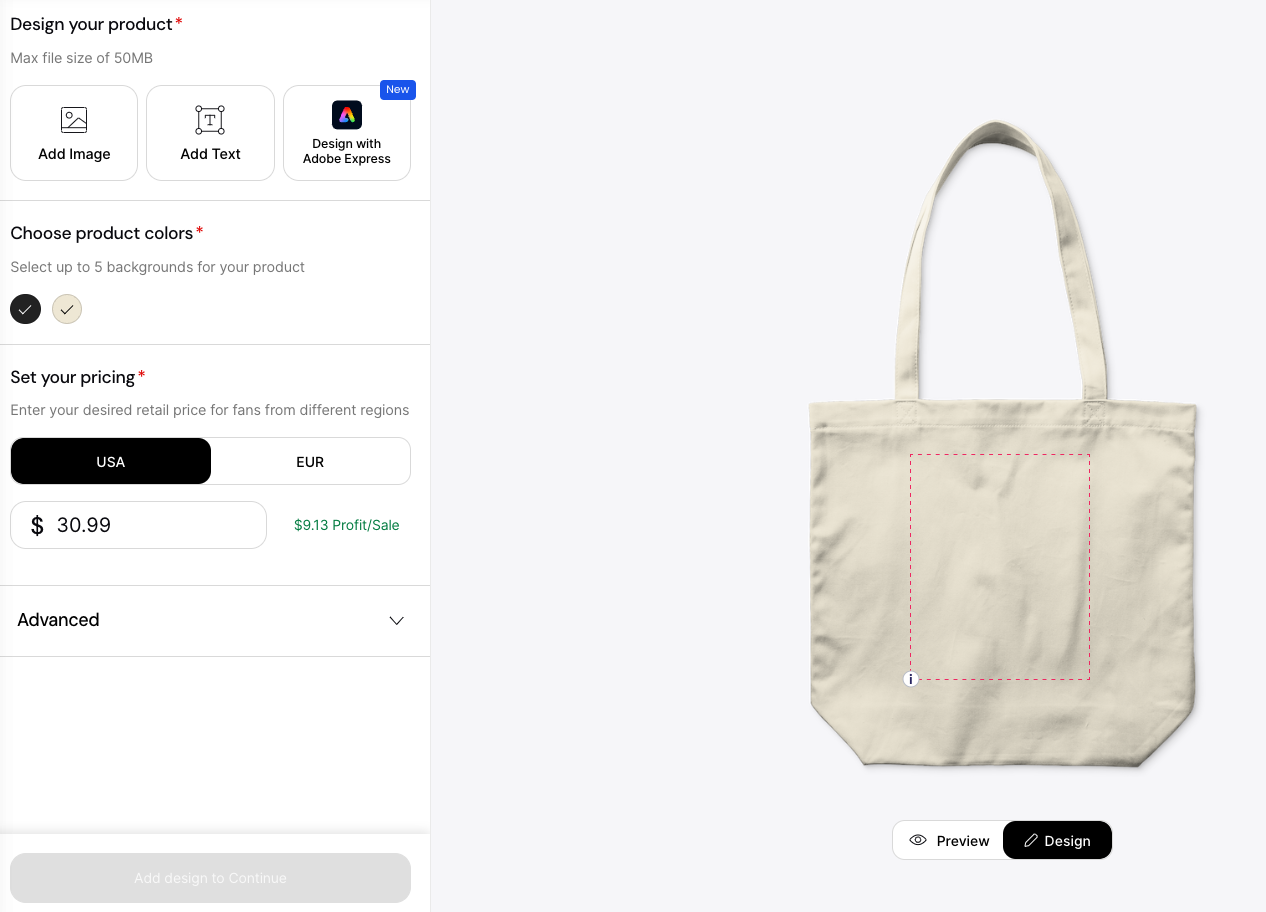
If you want to add new products to your collection, here are some tips to help you figure out what your fans really want. Then, you can use the Adobe Express integration to design something that feels fresh and matches the seasonal energy.
If you have some best sellers that deserve an update, you’ve got options:
Put the graphic on different products (a cute tote bag could be a great new home for your favorite t-shirt design)
Spring is all about rejuvenation. People feel motivated and energized — and your products and campaigns should help your fans feel this same sense of renewal. Design something that captures this energy and get those samples ordered so you can show it off in your content.
Update Your Storefront
You know that feeling when you finally organize your closet after months of putting it off? It’s time to bring that to your online store.
After you’ve cleaned out old products and created new ones, give the store itself a glow up. Update your graphics, polish your product descriptions, and make sure everything feels cohesive. Remember that if your storefront is easy to shop, you’re more likely to earn sales, so pay attention to the details.
Ready To Bloom?
Ahhhhhh. You’ve done the hard work of clearing out old products, refreshing designs, and giving your store a proper glow up. Now comes the fun part: creating content that shows off your perfectly polished products and watching the sales roll in.
Success isn’t built on massive overhauls — it’s built on small, intentional steps forward. Every creator you admire started exactly where you are, with one idea and one decision to start. You’ve already taken that crucial first step.
Ready to give your store that spring refresh? Head to your dashboard and let’s make something incredible together. Your next bestseller is waiting. ✨
Ready for the busiest, most profitable time of the year? That’s right! Election Day!… JK… The most profitable time of the year is the HOLIDAYS!!! And nothing says Holidays like snow, hot cocoa, and lots of GREEN. And we’re not talking about Grinch Green, but the kind that goes in the bank.
Updating your store to be in line with your brand and style will help you rake in even more money this year. That’s why we put together this cheat sheet with everything you need to do to customize your Spring store.
Plus, doing these three steps will mark off your first three bingo spaces! And if you don’t already know, you can win up to $3000 for hitting 5 in a row (read more about the competition here)! So let’s get started!
5 Seconds to Impress
It’s human nature. When we visit an online store, we first judge it by how it looks, and that can be the difference between a sale and someone movin’ on.
Facts:
82% of consumers are less likely to make a purchase if a store appears dated.
Shoppers are 5 times more likely to come to your storefront during the holiday season.
It only takes 50 milliseconds to form an opinion of a website and 75% of consumers judge a store’s credibility based on it’s design.
Products featured within storefronts get 58% more views and sell 20% more on average.
Knowing all this, you need to prep your store for this increased traffic, and you only get one shot.
4 Quick Steps to Prep Your Store:
Step 1: Refresh your content & organize your products
Scan your store. Top to bottom. Pretend you are a fan. How does it look to you? How much old content is on there? It’s time to sweep away the clutter and put your best merch forward. Here are some things to consider:
Get rid of old messaging. Add any new catchphrases.
Make sure your products are up to date! If something isn’t selling well, deprioritize it. Does that T-shirt need a new color? Change it up!
Consider refreshing your logo with a holiday twist.
To add a logo to your store, clock on Stores, Edit Store.
On the left-hand side, click on the Navigation bar.
Revamp your navigation bar and footer to make sure the aesthetic is consistent with your brand.
Re-order your products so your newest ones are first. You want your best sellers and holiday specials upfront and center. Featured products will appear at the top of your store, and there’s no limit to how many you can feature. Here’s how:
Go to your Store Editor
Click on Products
Click on the Star Icon to feature products
Another method to reorder your products: Remove them from your store (clicking on the circled x) and then re-add them based on the order you want them to appear. New products get added to the bottom of your store, so add the ones you want at the top of your store first!
Step 2: Update your banner
Customizing your Spring store is super easy, so why not give it a Holiday face-lift? For an instant effect, customize your Hero Banner. It’s the first thing your customers see and it sets the tone for the rest of your store.
First, click on the Hero banner in your store editor. Here you can drop in your image.
Tools like PlaceIt make it easy to create eye-catching lifestyle mockups. Just upload your design file, and you’re good to go.
Step 3: Add your branding
Adding your branding to your store makes it feel like YOU. Your fans already love your style and personality, so let’s bring that into your Spring store.
First off, add a logo to your store by clicking on Stores, Edit Store. On the left-hand side, click on the Navigation bar.
A logo not only sets your store apart but also helps your buyers recognize and remember you. 👀✨
Already have a logo? Perfect! Why not give it a holiday makeover? Add a little festive cheer with some fun Christmas fonts or sprinkle in a few snowflakes to spread the seasonal joy. If you don’t have a logo yet, now’s the perfect time to create one! Learn how to do that here.
But why stop at just a logo? You can also switch up the background and text colors in your navigation bar. Bright holiday colors might be just what your store needs to stay trendy this season! Just remember to keep your changes on-brand to keep your store looking sharp and cohesive.
And don’t forget about your footer! Keep that festive vibe going with a consistent design that ties your store’s look together from top to bottom. Staying on-brand in both your nav bar and footer will give your store a sleek, polished vibe that’ll leave a lasting impression.
Step 4: Get connected
How will you drive fans to your store? Your social channels, of course. So now is the time to make sure your channels are integrated. 50% of consumers are disappointed when a brand has no social media presence.
Here’s how to connect:
Go to Stores.
Scroll down to Social Profiles.
Connect your social media accounts.
Enable “Display Links” in your store editor under the navigation bar and footer.
If both are enabled, your social icons will then appear on the right-hand side of your navigation bar, as well as in the center of your footer.
Secondly, you want to make sure your domain is easy to remember. Keep it short, easy to type, and use a name that describes your brand. If you want to know how to connect or buy a domain, we’ve got that covered, too.
And that’s it! These steps will get your BINGO board started. Have fun connecting with your audience, fans, customers, and make a ton of Holiday Green!
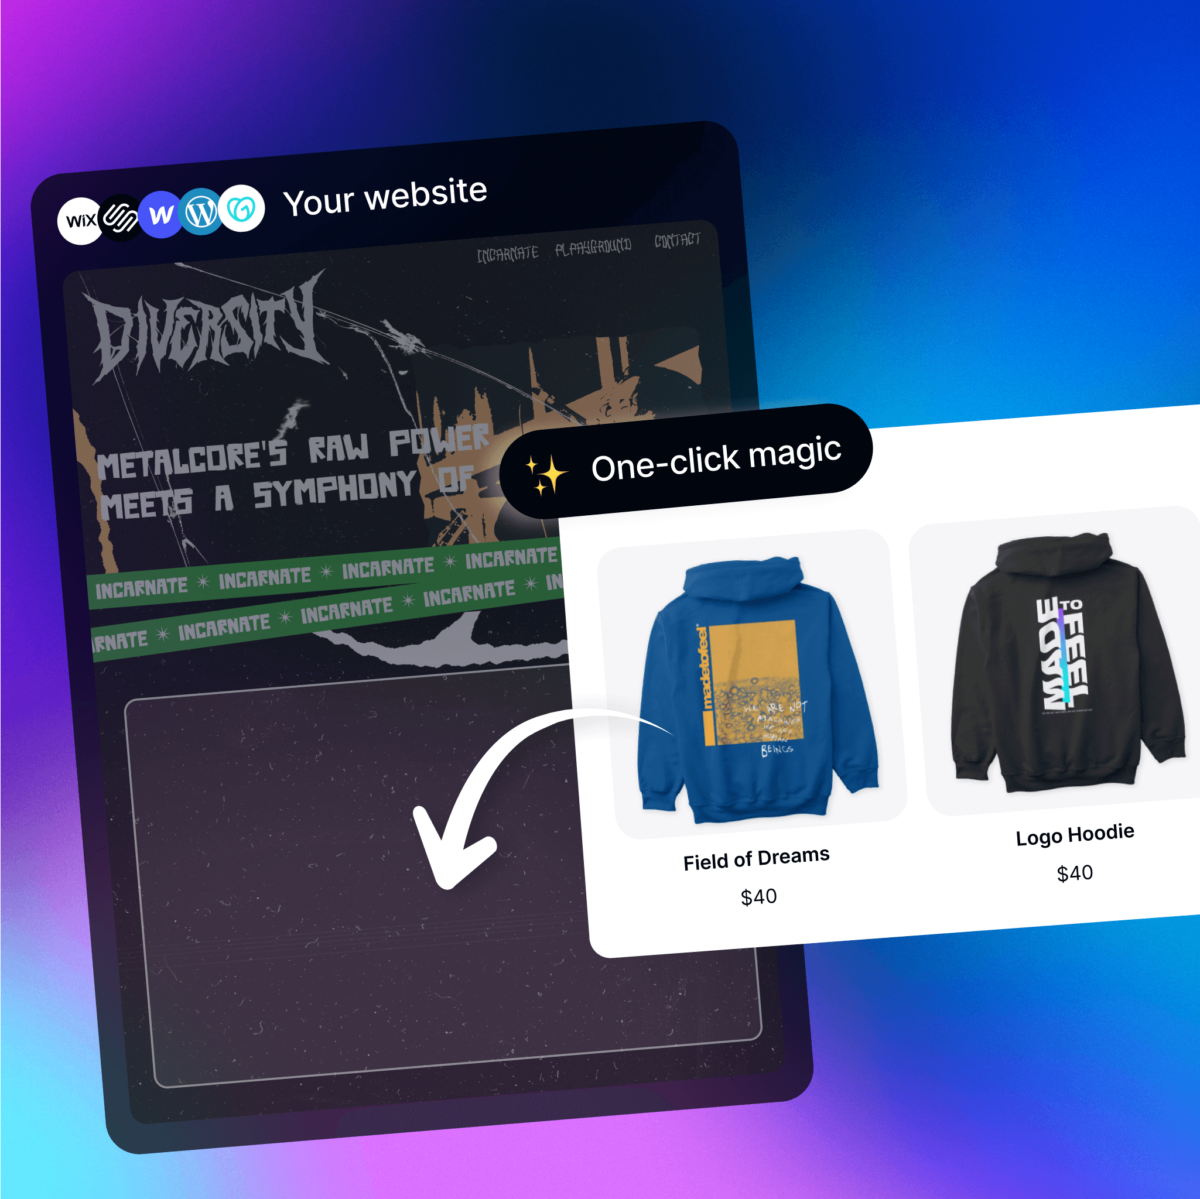
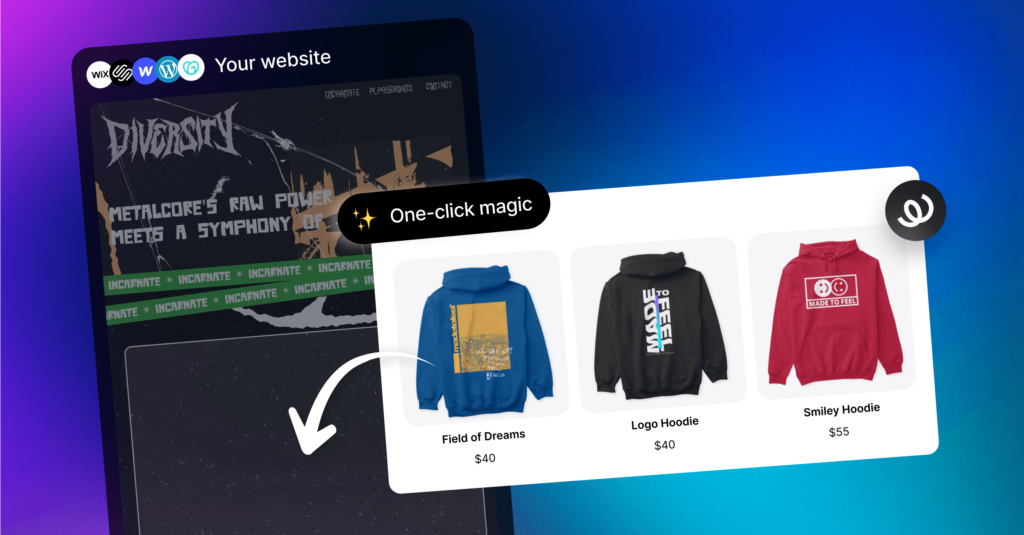
June 20, 2024 — Amaze, an all-in-one, end-to-end creator commerce solution is thrilled to unveil Store Drop—a groundbreaking feature designed to seamlessly integrate any Spring store anywhere that supports HTML with just one click. Store Drop empowers creators to effortlessly showcase their products across multiple digital landscapes, maximizing their reach and boosting sales without any technical skills required.
For too long, creators have faced the limitations of single-platform selling, struggling to reach new fans and maximize earnings. This uphill battle has stifled growth, creativity, and the freedom to fully capitalize on their talents. Store drop changes the game, enabling creators to integrate their stores across various channels, including social media platforms like YouTube and TikTok, as well as personal websites and beyond.
“Our mission has always been to empower creators to reach their fullest potential,” says Aaron Day, CEO of Amaze. “With the addition of Store Drop on the Spring by Amaze platform, we’re giving creators the freedom to expand their reach and connect with their audience in ways they never thought possible. This is the beginning of a new era in digital commerce, and we’re excited to see how our creators will thrive with this powerful tool.”
The transformation that Store Drop brings is about more than expanding reach and increasing sales; it is about freedom. Creators gain the freedom to innovate, connect, and strengthen their communities. Their products are no longer confined to one place—they are everywhere their followers are, which allows them to strengthen the connection with their community.
Before Store Drop:
Limited Reach: Products confined to a single platform.
Restricted Sales: Traffic and orders limited to one spot.
Audience Engagement: High engagement through content, but limited interaction outside.
After Store Drop
Expanded Reach: Stores now accessible across multiple platforms, reaching communities wherever they are.
Boosted Sales: Orders flowing in from every corner of the internet.
Enhanced Engagement: Strengthened connection with audiences through both content and products.
It’s time to say goodbye to limitations and hello to endless possibilities. With Store Drop, your digital world becomes a playground of opportunity. Drop your store like it’s hot and watch it thrive on every spot.
About Amaze
Amaze Software, Inc. is an all-in-one, end-to-end commerce solution for any creator looking to generate sustainable monetization and depth of community connection. Our creator success solutions include a merchandising platform, advanced commerce design application, and scalable managed services that help anyone sell anything, anywhere. We believe anyone can be a creator and that everyone should be empowered to tell their unique story, cultivate deeper connections with their customers, and create authentic, shoppable experiences that allow them to monetize their passion.
We’re on a mission to unleash potential and make it easy to create, share, and sell products and services. Build a no-code web page at www.amaze.co or launch a free store at www.springforcreators.com. For press inquiries, please email info@amaze.co.
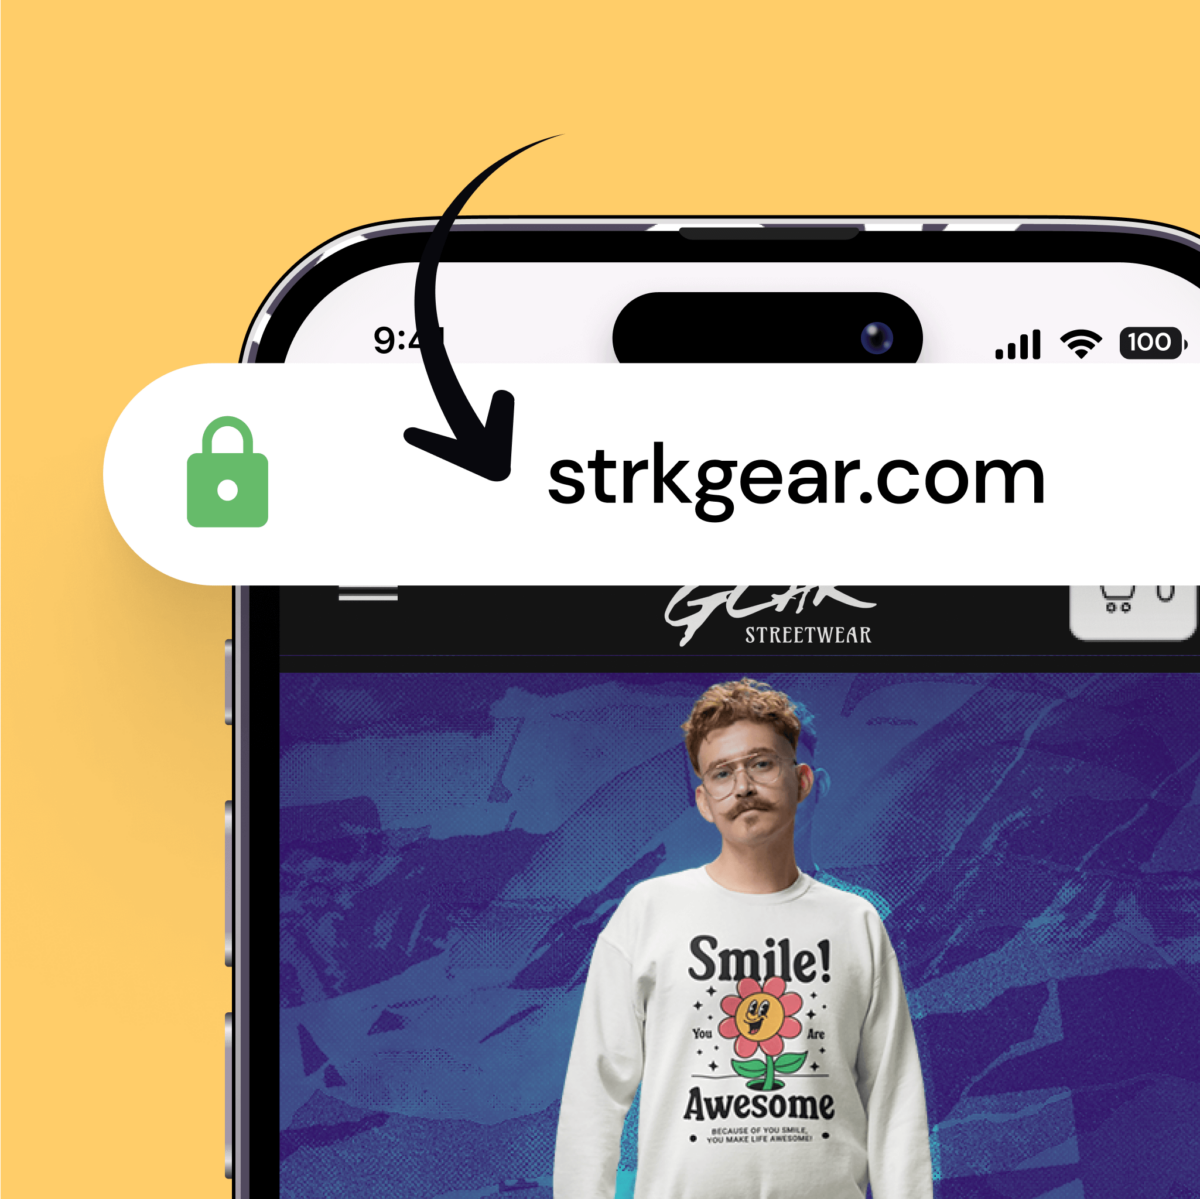
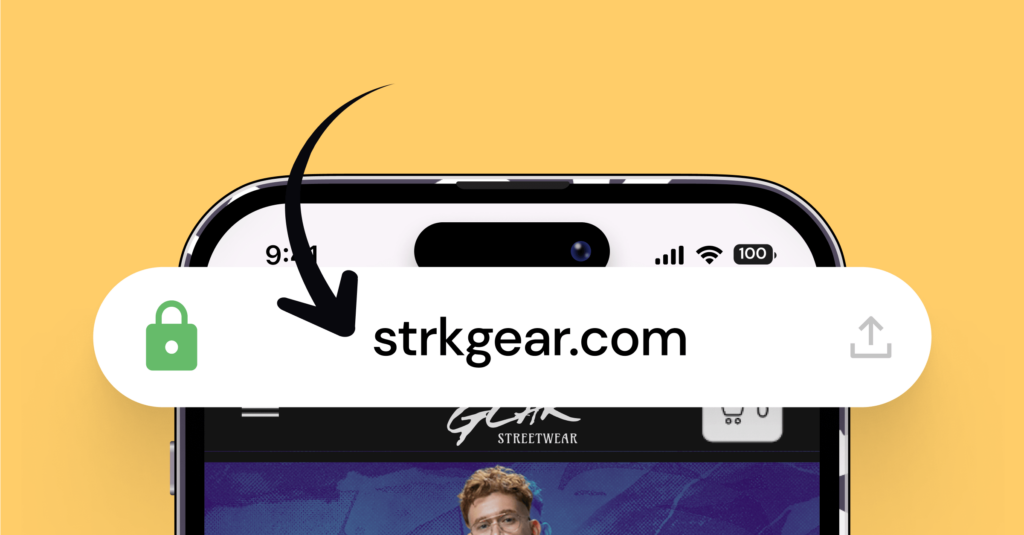
Securing a custom domain for your Spring store can level up your brand’s game and make your Spring store seem more trustworthy to your fans. And Spring makes it easy! You can either buy a domain directly from Spring or connect one you purchased elsewhere.
But before we get into that, what exactly is a custom domain?
A custom domain is essentially your own unique web address, like “yourbrand.com.” It’s a key piece in distinguishing your digital presence from others.
Unlike the generic URLs that Spring hands out when you start, a custom domain that echoes your brand vibe not only boosts your visibility but also gives off some major professional vibes.
People feel safer and more inclined to shop with brands that look polished and committed. When you connect a custom domain to your Spring store, you’re not just opening up shop—you’re building trust and deepening your connection with your audience. This can really set you apart from the crowd, making your brand the top choice in your niche. So, snagging that perfect domain isn’t just a techy detail—it’s a smart move that can drive your brand forward.
So, with that said, let’s get into how to connect an existing domain to your Spring store and how to purchase one if you don’t already have one.
How to purchase a domain
If you already have a domain, skip to the next step. But if you need to buy one, you’re in luck. Spring allows you to purchase your very own custom domain directly from your Spring account. Read the steps below and then click here to buy one!
Follow these steps to buy a domain:
1. Log Into Spring:
Hop on your Spring account to get started.
2. Navigate to Your Dashboard:
Click on the “Stores” tab in your dashboard, then select “Purchase a Domain.”
3. Find Your Perfect Domain:
Pop your ideal domain name into the search bar. You’ll see a list of available domains right at the top. Each one comes with the price tag for a yearly subscription, making it easy to compare and choose. If the name you like isn’t available, try switching up the ending—instead of .com, how about .net or .co?
4. Fill in Your Info:
Drop in your address and choose if you want your domain to auto-renew each year. Then, you’re ready to hit checkout.
5. Complete Your Purchase:
Once you complete your purchase, we’ll automatically handle the DNS records verification. Your domain goes live instantly—no waiting around!
6. Verify to Activate:
Look out for a verification email and follow the prompts to confirm your contact details.
Once you verify your info, your Spring store URL will automatically change within 24-36 hours!
How to connect a domain
If you’ve purchased a domain somewhere outside of Spring, you can click here to connect it to your Spring store.
Heres how to do it:
1. Edit Your DNS Settings:
Head over to your domain registrar’s control panel. You’ll need to add a couple of DNS records to link up your domain with your Spring store:
A Record: Add this (also known as the root record) to make sure anyone visiting your domain (like thecreator.com without the www) lands on your Spring store.
CNAME Record: This one makes sure that visitors to www.thecreator.com also get directed to your store.
2. Update Settings in Spring:
Once you’ve updated your DNS settings:
Go back to the “Stores” tab in your Spring dashboard.
Find the domain you’re setting up and click the ‘Setup incomplete, click to resume’ button. This checks if your DNS settings are pointing right.
3. Verify Your Setup:
If the initial check doesn’t work, hit the button again. Double-check the DNS records in your registrar’s panel, correct them if needed, and try verifying once more.
Verification might take a few minutes. If it’s still not working, just click the ‘Verify’ button again.
4. Success!
Once your DNS records are confirmed, you’ll see a success message, and you’re all set—your domain is now connected to your Spring store!
Grab a domain to help your brand stand out and grow!
Investing in a custom domain for your Spring store is more than just a tech upgrade; it’s a game changer for your brand’s vibe and trustworthiness. By stepping away from generic URLs, you’re not just making it easier for your fans to find and remember you—you’re showing the world you’re serious about your business.
A unique domain means you’re all in, creating a professional, sleek image that attracts customers and makes them feel secure when they shop. Think of it as your brand’s digital home base, where everything you do comes together under one memorable address.
Plus, hooking up a custom or existing domain with your Spring store only takes a few minutes and is super beneficial. It keeps your marketing tight and drives all your social media followers straight to one spot without any detours. This direct line doesn’t just enhance the shopping experience but also boosts your spot on search engine radars.
Getting set up is simple, quick, and all about letting you focus on your passion while we handle the tech stuff. So, why wait? Grab that custom domain, and let’s take your brand from just buzzing to absolutely booming!Buy or purchase a domain here!