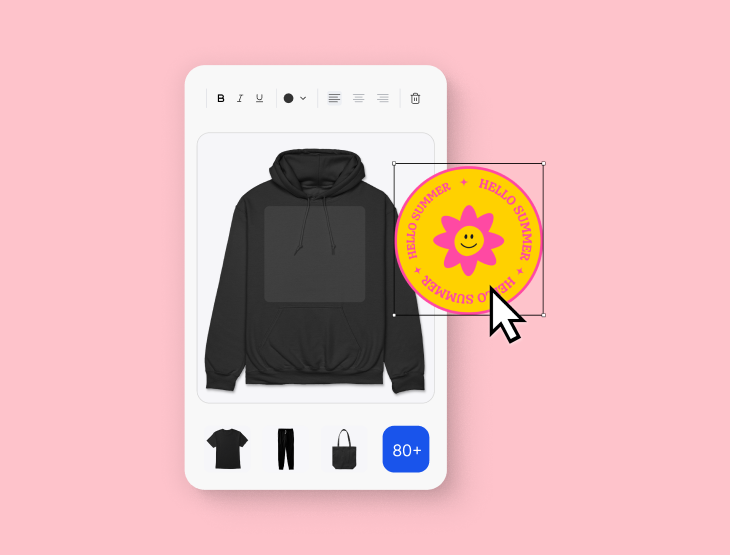
You don’t need to be a design wizard to create and sell products your fans will love. Easily design merch with Picsart and apply them to any product with Spring. There’s more… read on to find out.
Sign up to Picsart, create merch designs instantly
Spring creators who sign up to Picsart Gold get to enjoy the full creative suite for one month free. With your trial, you’ll be able to spin up designs for your Spring products in moments. Sign up to start below.
Thousands of templates, fonts, stickers, and tools at your fingertips
Design on both the mobile app and the web
20M+ high-res stock images
Easily remove and change design backgrounds with a click
No watermarks whatsoever
Save your designs as JPG, PNG, or PDF—take them to Spring to start creating.
Design with no ads whatsoever ✨
How to sell more with Spring using Picsart
React quickly to important moments in your community. Picture this: your fans just asked for a hoodie featuring a new favorite catch phrase. You need to create a design and start selling ASAP, before the moment passes. Use Picsart’s online design tools and templates to create designs and apply them to a hoodie on Spring in minutes.
Stay on top of design trends. Picsart has designs for all creators and genres of content, and they’re uploading new ones each week. Use the most up to date stickers by browsing the Hashtag section on the Picsart app.
Create promo content with ease. You aren’t limited to merch designs, either—promote your products easily and create engaging content on Picsart using promo templates, 1+ fonts, stickers, and Picsart’s video editor.
Participate in the Spring x Picsart Challenge for a 10% promo code
To kick off the Spring x Picsart partnership, we’re running a contest to get your creative juices flowing. It’s easy to enter, head to the Picsart app, sign up, and create a design with summer vibes.
1. Create a design on Picsart using the #SummerTShirtChallenge Stickers
2. Apply your design to a t-shirt on Spring
3. Get a 10% sponsored discount to give your fans (you keep 100% of your profits)
Enter the contest and sign up to Picsart below to get started.
After you’ve signed up to Spring, follow these simple steps and you’ll have everything you need to start creating and selling products to your followers.
1. Set up your store
Head to the ‘Stores’ tab of your dashboard to get started.
2. Set up your store
A great looking store not only streamlines your fans’ shopping experience, it compliments the products inside it—making visitors more likely to purchase products.
Before you start customizing your Spring store, grab your brand logo and think about the colors you use on your social profiles. Here’s some of the customization features available:
Logo and branding: Upload your logo and pick colors for your navigation bar, hero text and buttons.
Branded shopping experience: the branding elements on your store will be reflected on listing pages and even the transactional emails your fans receive after purchase.
Social media icons: clickable social icons to your store’s navigation bar and/or store footer.
Add a domain: Your store will have a unique URL generated based on its name, but you can also connect or purchase a domain. Learn more here.
Hero banner: use “advanced settings” to add custom buttons, headings and text to your store.
3. Fill your store with products
Once you’ve created products, start adding them to your store. Start in the Store Editor on the stores tab of your dashboard and click ‘Products’ on the left navigation. Star the products you’d like your fans to see first in the ‘Featured Products’ section.
Top tip: Check out your finished store within the editor to ensure everything looks perfect. Most fans will be on their mobile devices, so make sure you preview all your branding on both device views.
4. Fill your store with products
When you’re ready to start sharing your store live on Facebook Gaming, copy your store link from the Stores tab in your dashboard.
Find out how to start creating and selling products below.
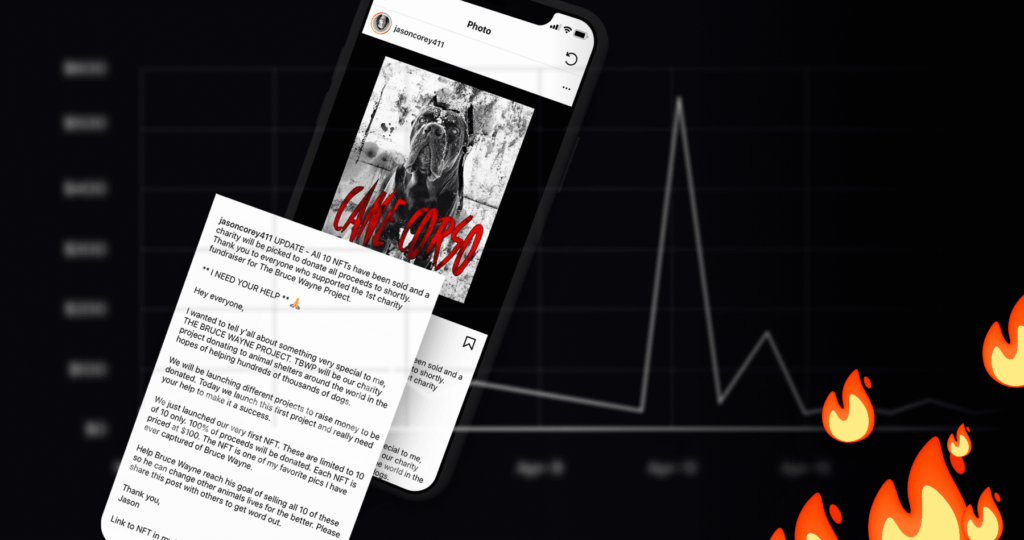
When Jason Corey dropped his first NFT project, he sold out within 72 hours. The secret behind getting fans to join him on his journey into Web3 was simple, but smart: come up with an idea fans really care about. Read the full story to learn more.
Step 1: find a topic you care about, others will too.
Jason Corey creates content on YouTube about his relationship with his beloved dog, Bruce Wayne. He’s passionate about sharing how incredible the Cane Corso breed can be (despite the fact they’re often seen in a negative light). Turns out there’s thousands of others who want to learn from Jason’s dog training methods:
“Within 6 months I hit over 100k subscribers. Since then, I’ve gained 250k total subscribers and changed the way people think of dog ownership along the way.”
Step 2: come up with a community driven NFT idea
Jason priced his ‘Bruce Wayne the Defender’ NFTs at $100 each—best of all, he pledged to donate 100% of the proceeds to a local animal shelter. His goal is to scale up, support larger charities, and make a widespread impact.
“Bruce Wayne has not only changed the entire Cane Corso world but just in general the dog world for the better. The community was strongly invested as it aligned with the well-being and protection of canines everywhere. I received quite a few messages after we sold out asking if we will be doing more charitable actions, which I am 100% going to do.”
The key to Jason’s first NFT project success was coming up with a community driven idea. His NFT drop gave fans a way to support him as a creator, and a cause they care about. Mint-On-Demand allowed him to upload his digital artwork and start selling in minutes.
Step 3: limited edition NFTs all the way
The decision to only launch 10 NFTs for his first drop was a smart one. The limited availability strategy creates urgency and increases the value—meaning Jason could sell them at $100 each. So what was the value for the NFT holders? Each of the buyers were officially the first to get behind the Bruce Wayne project. As the NFT project grows, they’ll be the original supporters.
Step 4: promote on social media organically
When it came to announcing his NFT drop, Jason found organic promotion worked best. Fitting it into his current content schedule and continuing to talk about the Bruce Project daily worked wonders.
“The best part was I didn’t even have to do heavy promotion to sell all 10. I mentioned it the start of a YouTube video, did 1 IG post and posted a couple stories each day. I have one of the best communities on YouTube. Everyone is so kind and generous and they were all quick to hop on board and show full support”
So, key takeaways. Think of a cause your community cares about. Come up a community driven idea, release limited NFTs, and increase value by communicating with fans about what’s coming up. We can’t wait to see what Jason does next.
Pins are a fun way for fans to show their support and rep your brand. We’ll help you source and sell—see how easy it is to sell your own and get started.
Spring handles everything for you including inventory storage, listing creation, order fulfillment, delivery, and fan support. All you need to do is pay a $50 deposit, design your pin and begin your presale (you need to sell 100 pins in 30 days to reach minimum order quantity).
Please read through design requirements and instructions before submitting your pin project below.
Soft enamel is our most popular pin type. Its defining characteristic is having colored paint recessed into the metal mold—giving the pins a dimensional look and textured feel fans love. These pins are a great option if you’re using simple designs with five colors or less.
Hard enamel (Cloisonne) pinsem
This type of pin features enamel that is polished flat across the design surface. They’re produced by adding and baking each individual color separately on the pin. After all colors are added, the pin is polished to achieve its iconic smooth finish. These pins are a great option if you’re using simple designs with five colors or less.
File formatting and design guidelines
This part is super important. Before you submit your design, you should check that it complies with the file formatting tips below.
File size: We recommend submitting high resolution files (300 DPI) with at least 2.5” x 2.5” (750 x 750 pixels) dimensions
Design complexity: A simpler, less detailed design works best.
Colors: Please use no more than 10 colors in your design. Submit designs only with block colors (no gradients or different transparencies).
Shape: Your design will be rejected if your pin features cut-outs—it needs to be a solid shape with no holes in the middle.
Choosing a size
The 1 inch option is the most popular size selection, however if your design features text or lots of details we may recommend choosing a larger size. Keep in mind, the larger the pin size, the more the base cost increases (which means your pin will need to be more expensive if you want to make a larger profit).
Finishing
We offer 16 different finishing options. You can choose from black, gold and silver. Your pin will feature a butterfly clutch backing. When your pins are fulfilled, they’ll be shipped in a clear polybag with an adhesive seal for protection.
2) How selling pins works
Pin pricing
Below is a price reference table. Please note these prices are not exact—they simply provide an indication of price range based on your pin size and quantity sold. Your pin’s base cost may be slightly lower or higher than the table based on how many you sell during your presale. The amount spent on the production of your pins (the base cost) will be deducted from your payout at the end of your campaign.
Here’s a breakdown of how the sourcing process works.
1) Submit request: Fill out the form with your pin characteristics and submit your request. We aim to process all requests within 24 – 48 business hours.
2) Receive your digital design file and pricing information—you’ll then be able to approve or reject.
3) Start selling: Pin production takes around 30-45 business days and inventory will be sent to our facility in the US. We’ll create product mockups for you and make sure to set the listing to ‘private’ so you can make it public and start selling when you’re ready. We can also send pins to you if you’d like to create promotional material or videos for the launch.
3) Promoting your pin to reach 100 sales
Once you’ve set your pin listing to “public”, you’ll need to have plenty of promotional content prepared to ensure you reach 100 sales in 30 days. You can do that in a number of ways—
<siberian lizard promo examples>
4) Pricing recommendations + fees
We’ll let you know what we think you should charge for your pin once your design is ready for you to approve. Spring charges a service fee which covers storing pin inventory (up to 60 days from last sale), creating product mockups, fulfilling orders, and handling customer service for you. Our service fee is 15% of the selling price (minimum $2). Normally pin retail prices range from $7 – $15. Pricing should depend on the a) base cost of your pins and b) how much you think fans will pay for this custom product.
For example, you source 1,000 pins with a base cost of $1.40 each. You pay $1,400 total. The selling price for each pin is $9.99 Spring’s fulfillment fee is $2. Therefore, your profit margin would be $9 (selling price) – $1.40 (base cost) – $2 (service fee) = $5.60 per pin. This means once you sell all your pins you keep $5,600 in profit.
Ready to go? Ensure you understand all of the design guidelines and begin submitting your pin project below.
A MOQ is the minimum number of units that need to be sold in order for us to start producing your product. For example, you need to sell at least 100 units to start pin production and generate earnings.
Why do I have to pay a $50 deposit?
The non- refundable deposit covers the cost of creating digital mockups and the time spent on reviewing and quoting your project.
What happens if I don’t reach the MOQ?
If after your 30-day campaign you have not sold 100 units (MOQ), we will need to notify your fans to cancel and refund their orders.
How long does the process take normally?
The entire pin process takes between 2 to 3 months. 30 days of pre-sale campaign, 30-45 days of production, 7-14 days of shipping to our facility.
When can I get paid?
You’ll be able to pay out your profits as usual only after your pins have been fulfilled at our facility and shipped to your fans.
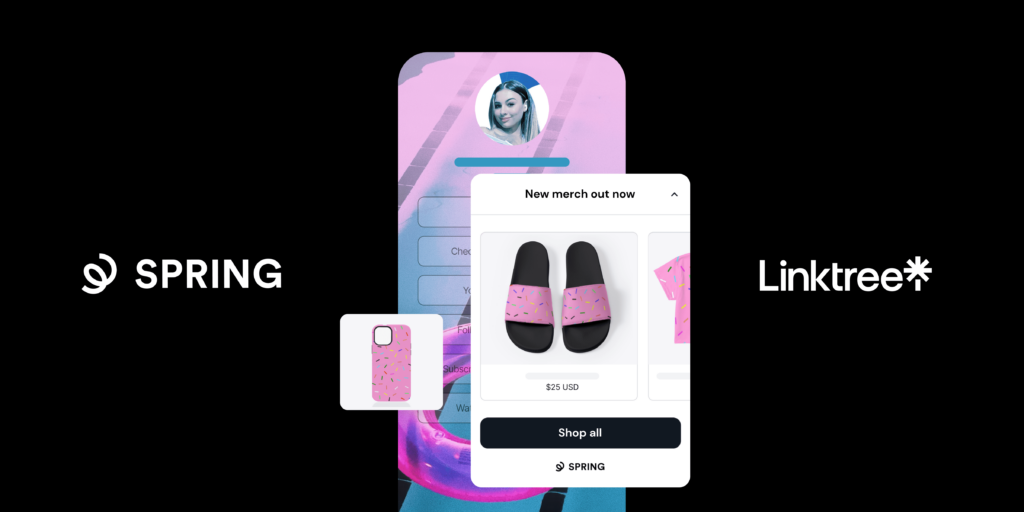
Today, Linktree announced the launch of Marketplace, a suite of apps allowing you to find new ways to engage fans and sell your products all in one place. Find out how to sell on Linktree the smart way by using new Partner Link Apps.
With more than 30 integrations with third-party apps and Link Apps, fans are able to to watch, listen, shop and more. Read the full story here. Newly added apps like Typeform, Reddit, and Gleam will come in useful for selling more on Spring. Find our tips below.
Inviting fans to co-create with you and have a stake on what products you launch next is key. Adding the Typeform integration to your Linktree is the perfect way to do this. Create a short survey asking your community to vote and share the results on your social channels. You might ask for their input on several engaging topics:
Let them vote on your next design
Ask them which types of products they want next
Run contests—try setting up a quiz. Give the winner merch (send a sample)
Run design contests. Get fans to submit their designs. The winner gets their artwork featured on one of your products
Reward your community using Gleam
This app is a cool one. Run contests within the app, set up instant rewards for quick actions (for example: “follow my YouTube channel and get an exclusive 15% off promo code”). Providing incentives for fans helps you grow and gets you more sales. Rewarding fans for their loyalty lays dividends. Find out more here.
Discuss new products on Reddit
Reddit is the perfect space to share thoughts and have discussions with your community, plus it’s the ideal spot to drop products. Set specific topics for your fans to discuss together, for example ideas for your next drop, things going on in the world you care about (turn it into merch), and more.
Add new products to your store
Adding new products to your Linktree is the best way to get fans heading to your Linktree to check them out. Create engaging social content using samples and direct fans to your Linktree within your captions to start shopping. See the products trending this summer below.
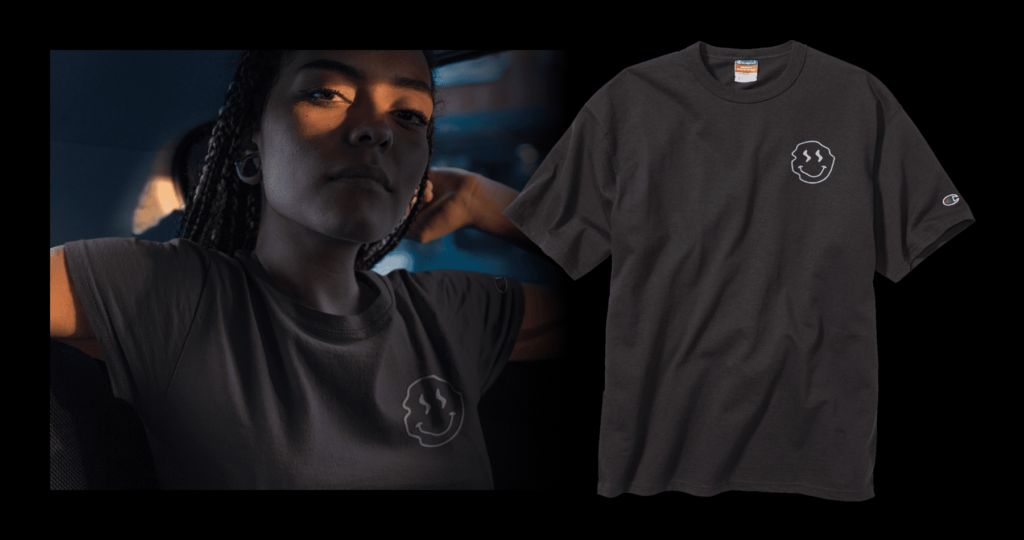
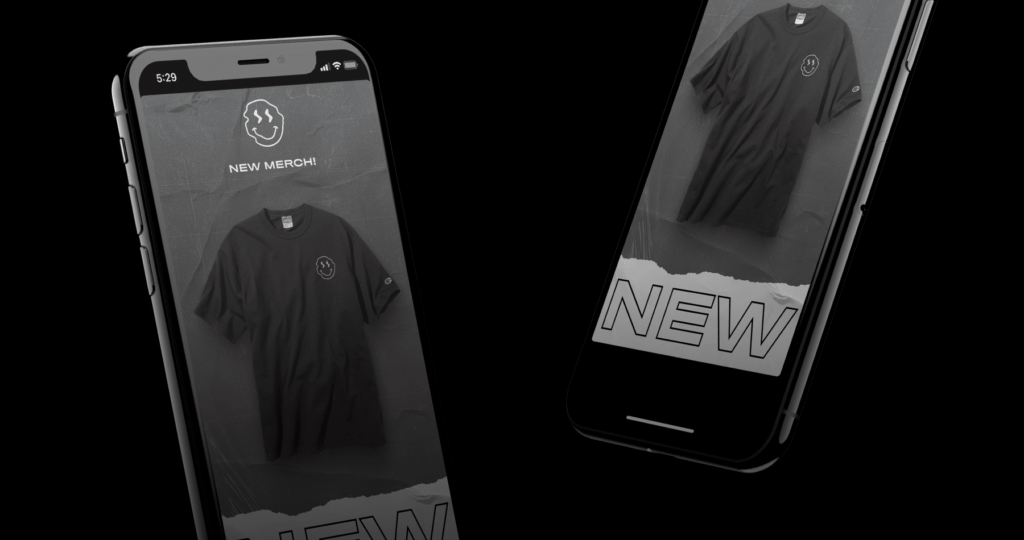
You’ve got first access to offer embroidered, official branded products; starting with Champion. So far, Spring creators who have created official Champion merch have made almost $690,000 in sales. Now it’s your turn.
Dropping limited edition products engages fans, big time. Plus, selling popular branded merch featuring your design is a testament to your success. Rely on Spring’s Custom Products team to handle everything from prototype design, sampling, logistics, listing creation, fulfillment, customer support, and more.
To start creating Champion branded products, read through the process, rules and guidelines, and top FAQs before filling out the submission form with your specifications below.
Note: You can only drop one product at a time. Please make separate submissions if you would like to launch more than one Champion product featuring different designs or colors. Fulfillment will take place in the US, but global shipping is available.
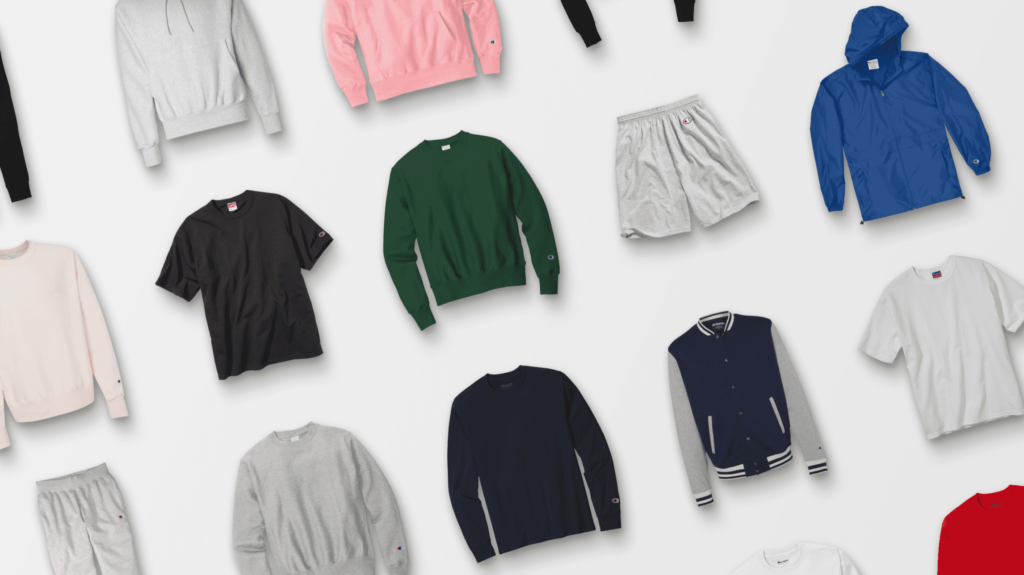
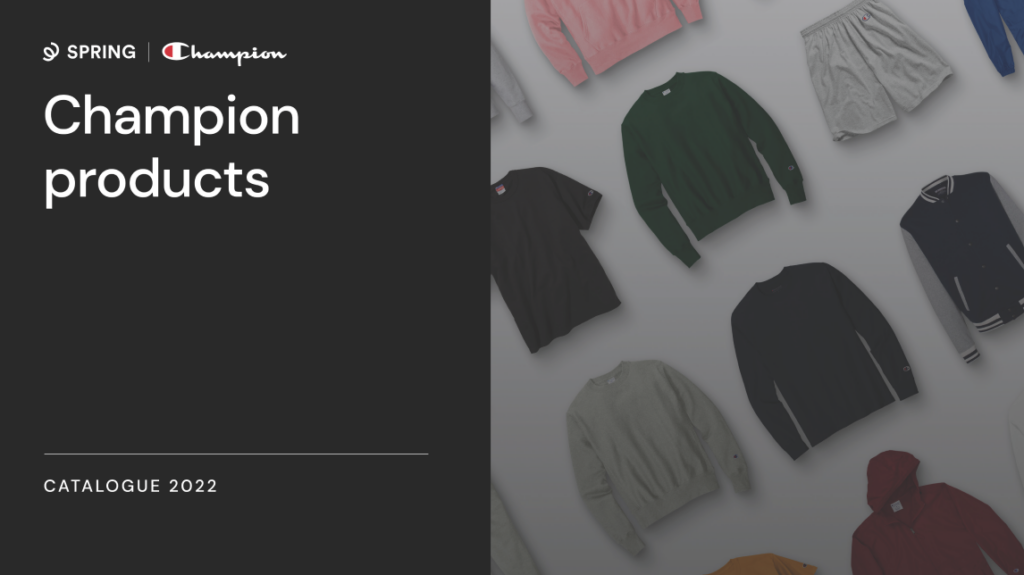
Champion product catalog
Look through the Champion products catalog below by clicking on the image. Choose the product you would like to offer and start thinking about the embroidered design element you’d like to add.
Design rules
Please review the design rules carefully below before you submit your application. If you submit a design that does not follow the rules below, we’ll have to reject your submission.
Your design cannot feature the Champion logo or wordmark
If you would not like to use our design services and have your own design, you must submit designs in PNG format with a DPI of 150 or higher
Your design must not contain any offensive imagery or text including references to politics, alcohol, tobacco, nudity, swear words, etc.
To get started, fill your details via the form linked at the top of the blog. We’ll review your application and ensure your profile matches with Champion’s requirements.
Once you’re approved, we’ll send a link for you to pay a deposit of $200. After this is paid, we can begin the process.
What does the $200 deposit cover?
This non-refundable deposit covers the cost of designing your original concept, creating your sample, and mailing it to you. The design stage includes 3 revisions to get your final embroidered prototype perfect.
2) Bring your ideas to life with Spring’s design team
After you’ve paid your deposit, you’ll be sent a form to let us know what you’re imagining for your embroidery design. Before completing the form, ensure you’ve read through and understand the guidelines below:
Understand your design guidelines:
Your design needs to be 4×4 inches max
Embroidery artwork can have up to 5 individual block colors.
Avoid using gradients
For tees, hoodies, outerwear: your design must be placed on the upper chest area only (left, right or middle).
For joggers, shorts, and sweatpants: your design can only be located on the left or right leg, upper thigh area.
Once you’ve submitted the form, our professional design team will create an embroidery design for your drop. This usually takes up to two weeks (dependent on revisions needed. 3 are included with your deposit, any further are $50 each).
3) Receive your first sample
Once you’ve approved the design prototype, we’ll embroider it onto your chosen Champion product. We’ll then photograph it and send it to you for your approval. The sampling process usually takes around a week.
After you’ve approved, we’ll ship it to you and notify you once it’s on its way—delivery can take up to a week or anywhere from 1- 4 weeks for international shipping (outside of US).
4) Photograph your sample, prepare to go live
When your sample arrives, it’s a good idea to photograph yourself wearing it. Send finished imagery to unlockd@spri.ng for us to include them in your listing (this gets more sales).
In the meantime, we’ll check there’s enough inventory available to go live and get your listing ready. When you’re ready to go, head to the “Listings” tab in your Spring dashboard and change your campaign’s visibility settings to “public”. Edit the product price if you wish.
From the day you set your listing to public, the pre-sale campaign will be live for your fans to purchase for two weeks.
5) Meet your MOQ with these promo tips
As soon as you set your listing to “public”, you have 14 days to sell 50 units to meet the MOQ (minimum order quantity).Ensure you have promo content ready to post on social media
Open for promo tips
Start creating hype on socials before you set your listing to public. Teasing your product the week before your presale begins will drum up excitement.
Take pictures with your product, feature your item in video content, show it off live
Make sure the link to your listing is discoverable—we suggest using Linktree
Create FOMO. Let your fans know they only have 14 days to purchase your limited edition design before it’s too late
6) Merch gets shipped, you get paid
Once your 2 week pre-sale campaign is over and you’ve successfully reached 50 sales, we’ll remove your listing and end the campaign (If the MOQ is not met for any item, that campaign item will be canceled, and orders will be refunded). Here’s whats next:
Typically, production and fulfillment takes up to 2 weeks. Shipping timelines will depend on the shipping method your fans choose at checkout and where they are in the world.
Collect your profits from the Payouts section of your account once your branded products have been shipped. We’ll notify you once they’re ready to be cashed out.
Promotional rules for branded products
We know you’ll be excited to share these products with fans and followers and we encourage you to promote these products through all promotional channels.
However, because you are accessing products through Spring’s Brand Partnership Program, and not directly through the brand, there are strict stipulations to acceptable promotional language and graphics that can be used. Any Spring creator who uses this language will have their listing suspended and lose access to Branded products as well as Spring’s Brand Partnership Program in general.
Language guidelines
The use of language such as ‘official collab’ or ‘collaboration’ in reference to Champion or tagging any official Champion social media accounts is a direct violation of brand partnership promotional requirements. When mentioning your products in videos or posting on social media please keep the following do’s and don’ts in mind:
Don’t use phrases like:
I’m collaborating with Champion
These products are an official collab with Champion
Don’t tag @Champion in any promotional posts
Do use phrases like:
I’ve unlocked official Champion products
I’ve created official Champion merch
I’m selling official Champion merch
I’ve designed on official Champion products
I’ve gotten access to official Champion products through Spring
Do tag @springforcreators in any promotional posts if you want to
Branded product FAQs
What is a MOQ (minimum order quantity)
A Minimum Order Quantity (MOQ) is the minimum number of units that need to be sold in order for us to go into production for that product. In this instance, you will need to sell at least 50 units per product style to go into production and generate earnings.
What if I don’t reach the MOQ?
If after your 14-day campaign you are not able to reach the MOQ of 50 units, all orders will be canceled and your fans will receive a full refund.
What does the deposit cover?
The non-refundable down payment deposit gives you access to work with a professional design team member to create an original design. The nonrefundable fee also covers a sample of the garment you intend to release with your artwork embroidered as well as shipping the sample to your home address.
Is the down payment deposit refundable?
The down payment deposit is a non-refundable fee that allows you access to use branded products. This deposit will not be refunded, even if the MOQ isn’t reached after your pre-sale campaign has ended.
What is the Project timeline?
Each project will have varying lengths. This is dependent on the time it takes you to pay the non-refundable deposit, your response time to each email, and the number of revisions needed for your design.
Shipping to your fans: 1 week (US based) / 1-4 weeks (International)
What if I have to put the project on hold?
If you decide for any reason to put your project on hold, we will consider the latest version of your design and/or sample as approved and will complete the project at that stage and consider our obligations fulfilled.
What if my fan’s order doesn’t get delivered?
If your fans have any issues with their order, please have them contact fanhelp@spri.ng.
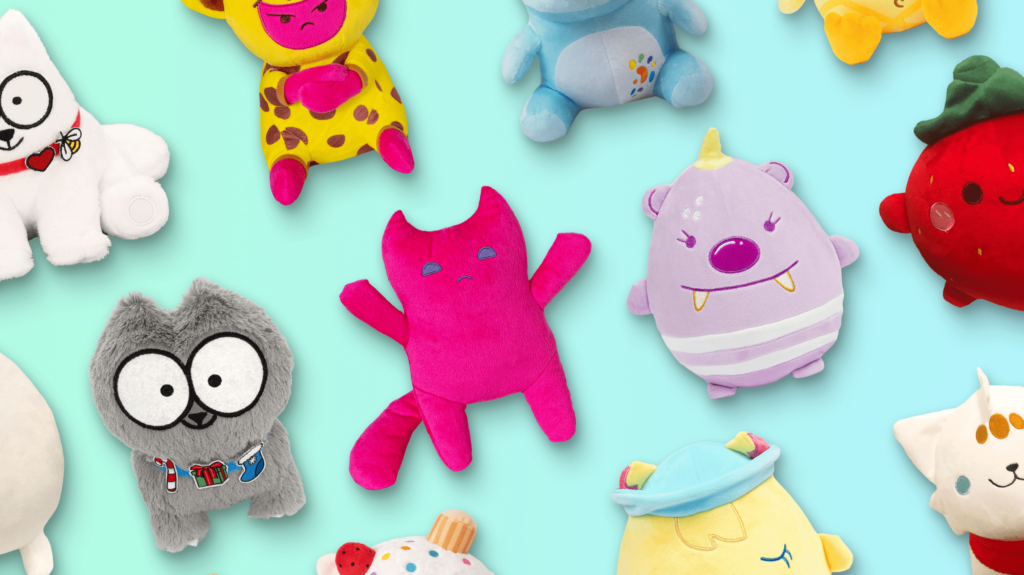
Fans love plushies: proven fact. So far, we’ve enabled creators to launch hundreds of thousands of plushies, making over $5,600,000 in sales. It works time and time again, and now it’s your turn.
Spring’s Custom Product Team are exclusively offering you the chance to create and sell your very own plushie. Diversify your revenue stream and rely on us to handle everything from prototype design, sampling, logistics, listing creation, fulfillment, customer support, and more.
To start creating your plushie, read through the process and top FAQs before filling out the submission form with your specifications below.
To get started, fill your details via the form linked above and upload sketches and/or imagery for our design team to reference (please submit as many details as possible). Once you’ve completed the submission form, we’ll send a link for you to pay a deposit of $500.
Please note: This non-refundable deposit covers the cost of designing your original concept, creating your sample, and mailing it to you. Both design and sample stages include 3 revisions to get your finished plushie perfect and ready for fulfillment (once you have met the MOQ, see FAQs at the bottom).
2. We design your plushie prototype
Next we’ll brief our plushie design team and they’ll bring it to life. It usually takes between 7-10 business days for us to get back to you with the first rendition of your design. You’ll then let us know if you approve or reject with feedback.
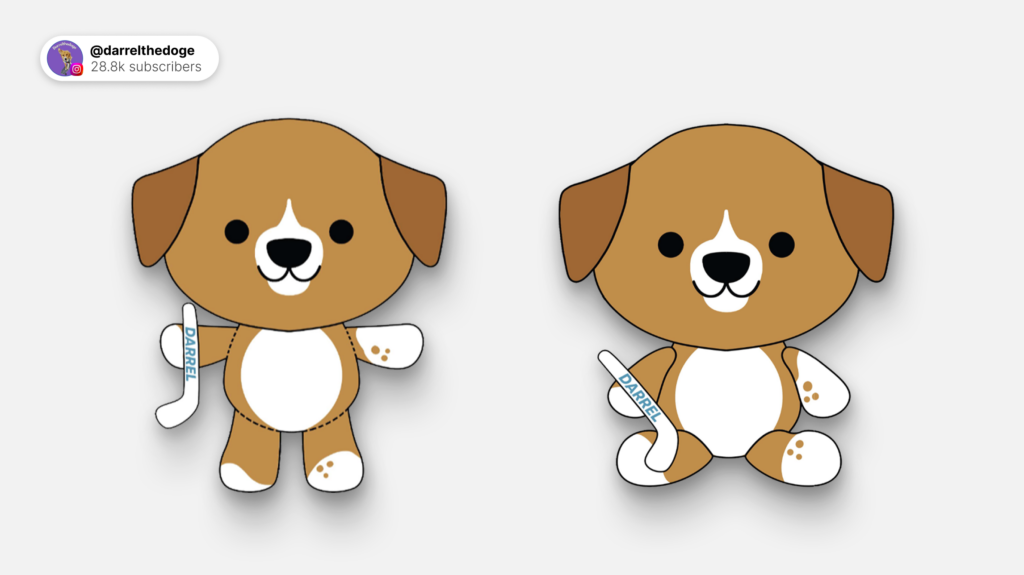
A useful way to offer feedback is sketching over the design provided so you can clearly indicate what you want to change. Please think carefully before submitting your feedback and try to submit it in one go. You’ll have a total of 3 design revisions. Anything beyond will cost $50 per revision.
3. Creating your plushie prototype IRL
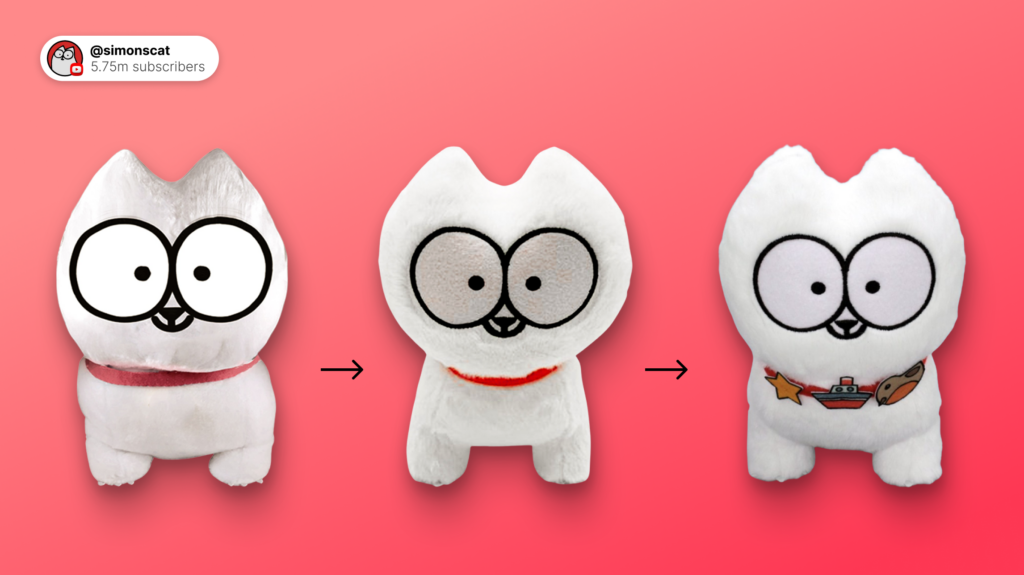
Here’s the exciting part. Once you’ve finished with the design team, we’ll send it over to the vendor to begin crafting your plushie prototype. This process takes up to 10-15 business days. Once it’s ready, we’ll do a thorough quality check and send you an image of the sample. Then there will be another opportunity for feedback (the 3 revision rule counts here, too). See the example below of Simon’s cat’s feedback.
4. Meet your plushie for the first time
Once you’ve approved, it’s time for you to give your plushie its first squeeze. We’ll notify you when we’ve shipped it to the address you provided when you first applied.
5. Choose your profit
Next, let us know what price you would like to sell your plushie for and the profit you’ll earn per sale. Our recommended retail price is between $24.99 and $29.99. To calculate your payout, deduct your plushie cost (we’ll let you know) and fulfillment cost ($4 per unit) from your desired retail price.
6. Photograph your plushie
Time to get your camera out (or a smartphone works)—we’ll customize your listing with the photos you take of your prototype. These are the photos that fans will see on your store and listing page. Here’s our top tips for photographing your plushie:
Ensure your lighting is right. We recommend using desk/standing lamps—make sure the plushie doesn’t cast any shadows and is clearly seen. Make sure your smartphone lens/ camera lens is clean and the pictures are clear and focussed.
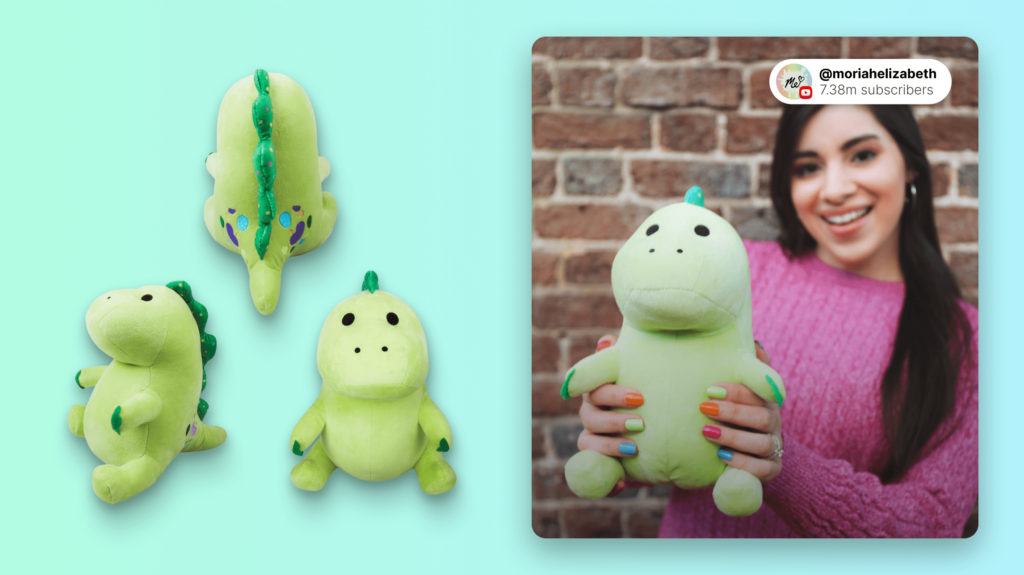
Get all the angles. Photograph it from the front, the back, and one angled view.
Correct formatting. All photos should have a 1:1 aspect ratio (square). Use photoshop, or there’s plenty of tools online you can use.
See examples of @moriahelizabeth’s Pickle plushie listing imagery below.
7. Go live and promote your plushie
Next, we’ll get your listing ready for you to announce your plushie to fans. When you’re ready to go live, head to the “Listings” tab in your Spring dashboard and change your plushie visibility settings to “public”.
Make sure you’re ready to promote before you set your plushie to public. After your first plushie sale, you have 30 days to sell 299 more to meet the MOQ (minimum order quantity). Make sure you are ready to promote before setting the listing “Public”.
Share the listing images you photographed on social media
Take pictures with it, feature your plushie in video content, show it off live. See how Simons Cat did it.
Make sure the link to your plushie listing is discoverable—we suggest using Linktree.
Create FOMO. Let your fans know they only have 30 days to purchase your plushie before it’s too late.
8. Plushies get shipped, you get paid
Once your campaign is over and you’ve successfully reached 300 sales, we’ll remove your listing and end the campaign. Then it’s time to start production for your plushie. Typically, production takes anywhere between 30-45 business days. Shipping often takes around 45 to 90 business days. You can collect your profits from the Payouts section of your account once your plushies have been shipped. We’ll notify you once they’re ready to be cashed out.
Plushie FAQs
Am I involved in the design of the plushie?
Yes, of course. We will not move each stage of creating your plushie prototype without your approval. You are able to approve or reject at both design and sample stages. You’ll be able to give feedback, too—your deposit covers 3 revisions. Any beyond that will cost $50 per revision, so ensure your feedback is detailed.
What is a minimum order quantity (MOQ)?
A MOQ is the minimum number of units that need to be sold in order for us to start producing your product. For example, you need to sell at least 300 units to start plushie production and generate earnings.
Why do I have to pay a deposit?
The deposit covers the cost of designing your original concept. It also covers the cost of creating and mailing you your product sample. Both design and sample stages include 3 revisions to get your finished product right.
Is the down payment deposit refundable?
The deposit is a non-refundable fee that covers the cost of designing an original plushie concept and producing your sample. This deposit cannot not be refunded, even if you choose to cancel your plushie project because you have not reached the MOQ.
What happens if I don’t reach the MOQ?
If after your 30-day campaign you have not sold 300 units (MOQ), we’ll reach out to you to discuss next steps. You’ll have 3 options:
Utilize the earnings you have made so far to cover the remaining cost needed for us to reach 300 plushies and start production.
If your earnings after 30 days are insufficient (not enough to cover the missing sales), you can send us a balance payment for the remaining amount needed for us to start production.
You may decide to cancel the project. In this case, Spring will notify and refund your fans. Please note, it is not possible to refund your deposit if you choose to cancel.
What happens with the remaining plushies I paid for with the balance payment/earnings?
In case you’re not able to reach the MOQ and we are still able to go into production (see options above), all remaining plushies will be shipped directly to you for $1.50 per unit
What if I have to put the project on hold?
If you decide for any reason to put your plushie project on hold, we will consider the latest version of your design and/or sample as approved, and will complete the project at that stage and consider our obligations fulfilled.
How long does the process take normally?
From conception (designing your plushie) to completion (receiving your plushies in our facility), this entire process takes between 3 to 5 months. This timeline varies depending on the number of revisions needed, or the delays related to the current state of the worldwide Supply Chain.
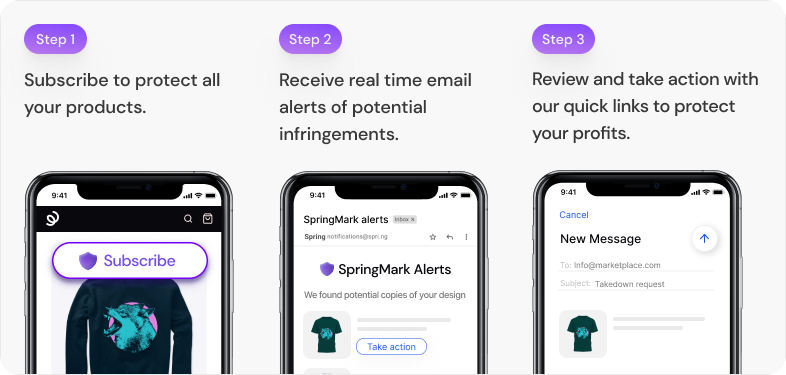
Subscribe and sit back while SpringMark asset protection technology scans 34 popular marketplaces for your content.
Now, you’ve got a secret weapon to help ensure all search engine traffic (and profit) goes to you and your store. See a summary of the benefits below:
Earn what’s yours, avoid losing $10+ whenever a copy of your product is sold
Safeguard your brand and protect fans from low-quality, copycat products
Save time searching for copies of your designs across the internet
How SpringMark works
By signing up to SpringMark’s monthly subscription, you can protect all the listings on your store. We’ll send you weekly reports, as well as real time alerts as soon as we detect any potential copies. If we don’t find any problematic uses of your design, happy days. If we do, you’ll be able to review and report content using quick links provided.
Time to generate some hype around your new product. How about creating an incentive? Offering a discount can increase sales by 60%. See your next steps below.
Create a promo code in the Promotions tab of your dashboard.
Create content with your product and promo code.
Be sure to include links to your store
Create urgency and run the sale for limited time only
Watch this video to see how to create promo codes instantly in your dashboard.
Seamlessly promote your products with Spring’s social integrations. Make your products discoverable and accessible in fun and engaging ways. Start with Linktree and set it up in minutes.
Our advice?
Activate Spring’s social integrations
Create engaging content
Use integrations to link your products
See how @workforyourbeer promotes products with Spring’s Social Integrations.