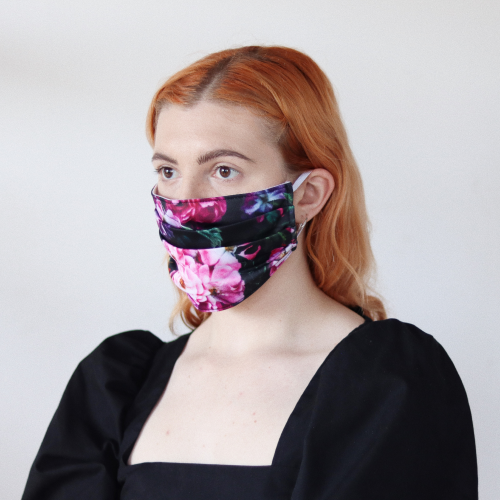
You can instantly create and sell custom cloth face masks in the launcher. This product is fulfilled globally, meaning we’re able to optimize production and delivery timelines based on your fans’ location. Adding face masks to our product offering is the direct result of numerous requests from our user community. We hope this new product offers creators and their followers a sense of community and self-expression in the process.
Product details: Cloth face masks provide full nose and mouth coverage when worn. Each mask’s exterior is made of 100% polyester and can be customized using sublimation print. The interior of the mask contains 100% cotton lining in white. Masks include two white, elastic ear loops on each side so people can comfortably wear them over their face.
Please note cloth face masks are not medical grade products. You can reference the Center for Disease Control (CDC) and the World Health Organization (WHO) for recommendations on the best types of face coverings to use for self-protection
Single-sided print (exterior)
7″ w by 3.5″h size
Two elastic, white ear loops
Covers mouth and nose
100% polyester exterior with 100% cotton lined interior
$7.50 base cost and $12 – $15 recommended retail price
Care instructions: machine wash cold, line dry, do not bleach
Design formatting tips: Face masks are fully integrated in the launcher so you can create them instantly. The exterior of each mask is decorated using sublimation print so you can create a variety of vibrant and eye-catching designs. If you plan to add a logo or text to your mask, consider using our design template to check the ‘safe’ area for placing these elements (see image below)—when worn, the sides of the mask may fold to fit the curve of the face, so design elements outside of the safe area may be hidden under the folds.
Keep in mind we recommend creating design files that are 8.3″w by 7.8″h (2490 px x 2340 px) @ 300 ppi. Check out our free pattern collections that can be uploaded to the launcher as well as our inspiration board for more design ideas. Quick tip, you can easily apply your existing t-shirt designs to this product and choose a colored background in the launcher too.
How your design will look from template to preview
Head to the launcher now and select “Cloth Face Mask” to upload your design. If you’re new to Spring you can check out our full launch tutorial here.
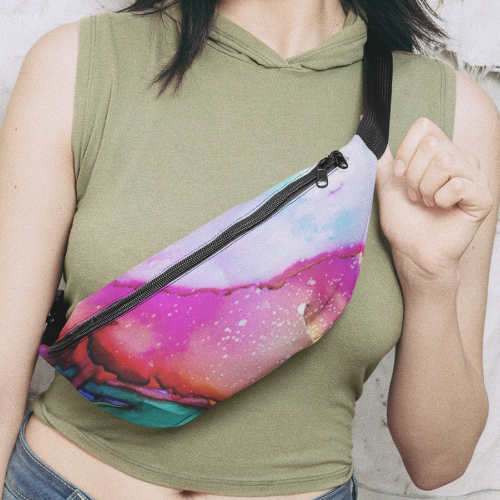
Fanny packs, also known as waist bags or hip packs, will continue to trend as one of the hottest selling accessories this year. You can earn $15+ with each fanny pack sale while giving customers a stylish way to carry their stuff with plenty of storage options and an adjustable fit. Head to the Teespring Launcher to create this exciting new product instantly.
Designs are printed on the front of fanny packs (single sided print) and the back panel is black, which matches the adjustable strap, interior lining, and zippers. With a base cost of $19.75, Teespring users can expect to make $15+ in profit when selling fanny packs at our recommended retail price of $34.99.
Fanny packs are made of lightweight, 100% spun polyester with a fully lined interior.
They also feature a strap which can be adjusted to 52” at full length to accommodate a variety of sizes.
The back panel is made to protect from wear and tear and is easy to clean.
Fanny packs offer a variety of storage options and feature a back pocket with zipper plus an interior pocket with zipper and three card holders.
Design inspiration
You’re able to customize the entire front area of this product, which leaves a lot of room for imagination. Check out our free design patterns linked below plus our fanny pack inspiration board on Pinterest to see what’s selling. When designing fanny packs, keep in mind the printable dimensions are 15.56″ x 5.72″ (2,334 x 858 pixels) for the main panel, and 15.56″ x 2.04″ (2,334 x 306 pixels) for the top panel. We recommend creating designs that are 300 DPI (minimum of 120 DPI) for highest quality print possible.
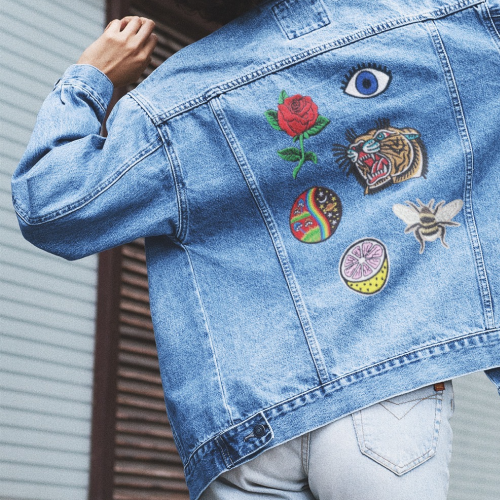
We’ve streamlined the process to help you easily source and sell custom patches. This product is perfect for adding a personal touch to items like backpacks, beanies, jackets, and more. Now you’ve unlocked patches in the launcher, you’ll be able to submit your product request for processing.
Just like lapel pins and keychains, patches cannot be produced on demand and require a minimum order quantity of 100 units. You have the option to pay for inventory upfront, or you can create a pre-order listing and we’ll process orders using the money generated from pre-order sales. Don’t forget as part of our TeespringGo service we’ll handle inventory storage, order fulfillment, custom support, etc. for you too. Continue reading to learn more about how you can source and sell custom patches.
Part 1: Customizing your patch
The patch type you choose will depend on your design.
Embroidered patches make the most of high-contrast designs and are the perfect combination of affordability, durability, and design potential. Embroidery makes designs look sharp and textured by highlighting details
Printed patches offer a higher level of design detail compared to embroidered patches. Choose printed patches if you want to create a vibrant, full-color design.
Patch Characteristics
Backing: embroidered patches feature iron-on backing—this way customers can easily attach their patches to various fabrics (following these steps for example). Keep in mind customers can also attach patches to clothing and accessories by sewing them on or using safety pins if they prefer.
Base material: patches feature polyester blend twill base material. This provides each patch with a stiff base to embroider on.
Border: patches feature a merrowed border (overlock stitch) to secure design threads.
When submitting your embroidered patch request, these are the characteristics you can customize using the form:
Design file
Vectorized design files are preferred, but we can accept JPEG, .JPG, .PNG, .AI, .EPS,.PSD, .TIFF and .PDF design files. We recommend submitting high resolution files (300 DPI) with at least 2.5” x 2.5” (750 x 750 pixels) dimensions. If you’re not able to submit a design file through the form you can provide a design link in the comments section of the form instead. Keep in mind small fonts/details are not recommended for embroidery. We recommend limiting designs to 9 colors or less; adding 10+ colors will increase the base cost of your patches. Keep in mind if your patch design features neon colors this may increase the base cost slightly as well.
Embroidered patches: Small fonts and details are not recommended for embroidery. We recommend limiting designs to 9 colors or less; adding 10+ colors will increase the base cost of your patches and/or require the use of printed patches instead. Keep in mind if your embroidered patch design features neon colors this may increase the base cost slightly as well.
Printed patches: Printed patches enable you to use full-color designs. Keep in mind the complexity of your design will determine the print method used; for example screen printing is typically used for basic designs and patterns, while direct-to-garment printing is used for photo-realistic images and complex, multi-color designs.
Patch size
The most popular patch size is 3 Inches, however, if your design features text or lots of details we may recommend choosing a larger size. Keep in mind the larger the patch size the more the base cost increases. Standard sizes range from 2 inches to 6 inches. Custom sizes are available upon request.
Quality (base cost)
Because patches are not produced on demand they require a minimum order quantity of 100 units—meaning you must order (or pre-sale) at least 100 units for your inventory to be produced. Keep in mind that the more units you order, the lower the base cost. Please note we also recommend ordering an additional 5% of inventory for replacements and exchanges. Below is a table with examples of price ranges, please note your quote may vary depending on the number of thread colors in your design and patch size.
Selling price
Popular pricing for patches ranges from $4 to $12. You will decide what selling price you want your patch to have and how much profit you’ll earn per sale. Spring charges a fulfillment fee that is 15% of the selling price (minimum $2) which covers inventory storage, order fulfillment + packaging, customer support, etc. This fee is collected each time a patch is sold.
Part 2: Sourcing & selling patches
Here’s a breakdown of how the sourcing process works.
1. Submit request
Once you’ve unlocked patches you’ll see the ‘Custom patch’ product icon in the launcher. Click the icon and fill out the form with your patch characteristics and submit your request. We aim to process all requests within 24–48 business hours.
2. Pay deposit
Once we receive your submission we’ll send you a non-refundable deposit payment link for $50. The deposit will go towards the inventory cost once you’re ready to place your order.
3. Approve quote
Once the deposit is paid we will process your request and follow up with a quote and product mockups in the next 24-48 business hours. These will require your approval before we continue with processing your request.
4. Source + sell
You have the option to source patch inventory upfront, or you can run a pre-order listing and use the funds from pre-orders to pay for inventory. Here’s how it works:
Quotation 1: Pay for inventory upfront
When you approve the quote and the mockups the next step is to pay for the full inventory. Once full inventory payment is received your patch order will be processed and we’ll confirm the estimated delivery time for your patches to reach our facility. Once payment is processed your patches should reach our facility within 14 business days.
Once inventory arrives we’ll take product photos and create the patch listing for you. We’ll make sure to set the listing to ‘private’ so you can make it public and start selling when you’re ready. You can sell your patches until stock runs out.
Quotation 2: Pay for inventory upfront
We offer a pre-order option for creators who are unsure how much inventory to order or would like to avoid paying for inventory upfront. Here’s how it works:
After approving the mockup you’ll need to confirm the minimum order quantity (MOQ) you’re comfortable with — i.e. the minimum number of patches you plan to sell. Note the MOQ must be at least 100 units and the quoted price is locked in once the listing is created (i.e. if you sell over 100 units the base cost will not change).
Next we’ll create a pre-order listing for buyers to reserve their patch. The pre-order period usually lasts two to four weeks. The limited time aspect can create FOMO (fear of missing out) and result in more orders placed within a short period of time.
We’ll inform buyers of the estimated delivery timeline for their order on the listing page and within confirmation emails. We’ll also advise them of the minimum order quantity so if the MOQ isn’t reached they’ll understand why their order is cancelled.
After the pre-order period ends (and MOQ is reached), we will use the funds from orders to pay for the inventory. Please note we also recommend ordering an additional 5% of inventory for replacements and exchanges.
Inventory should arrive within 14 business days once production begins. At that time we’ll send the orders to your buyers.
5. Get Paid
After patch orders are shipped to buyers, profit from sales will be available for withdrawal within your Spring account.
Visit the launcher now to see if you’ve unlocked patches.
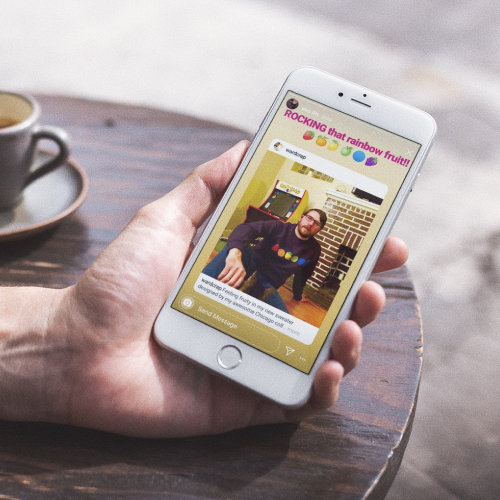
Social proof is an important marketing tool, especially when it comes to online shopping. Social proof normally includes user-generated content like customer testimonials, case studies, online reviews, etc. Considering 84% of millennials are likely to be influenced into making a purchase based on user-generated content (social proof) it’s clear just how powerful social proof can be!
Lots of creators incorporate social proof into their promotional efforts by collecting and sharing their community’s photos. Photos of fans wearing and using your products generate hype, as well as affirm the value and quality of the products you’re selling. This content also functions as positive reviews of your products. Sharing them is an engaging way of generating trust in your brand. Not only this, but it also brings your community together, leading to more sales in the future.
Check out our video and complete guide below for examples of how creators are using social proof to leverage more merch sales—get inspired and try them out for yourself.
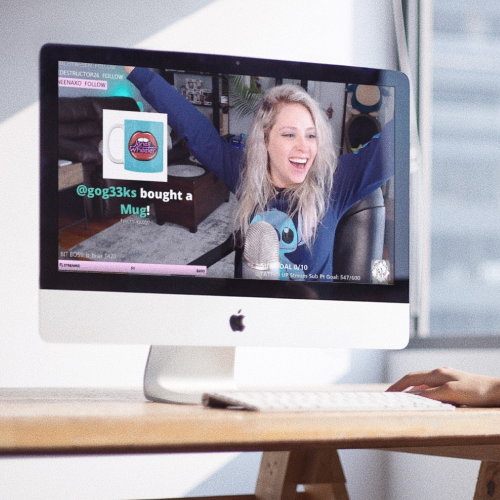
Did you know personalized merch alerts can help increase your sales by 30%+ while streaming? Activating personalized merch alerts is easy and you can customize their appearance within Streamlabs too. Once activated your buyers will be able to add a personalized message post-purchase that will be visible to you and all viewers on stream.
Once you’ve connected your Streamlabs x Teespring accounts, make sure you’ve got the “Merch” alert ticked within the Alert Box section of your Streamlabs account (under Features > Alert Box > Merch). Check out the video above for more info.
Using multiple alert providers
You can use Streamlabs for merch alerts while using other alert providers for other alert types. Just make sure there’s no overlap with activated alerts on each platform—for example, if you’re using merch alerts on Streamlabs make sure they’re deactivated on StreamElements.
Setup your Twitch Merch Store
Don’t forget you activate your Teespring x Twitch Merch Store Extension Panel to compliment your merch alerts. The panel enables viewers to purchase your products directly below your stream.
Customizing alerts
You can customize the appearance of your merch alerts directly within your Streamlabs account. Use the sidebar to select Features > Alert Box > Merch to access your alert customization settings.
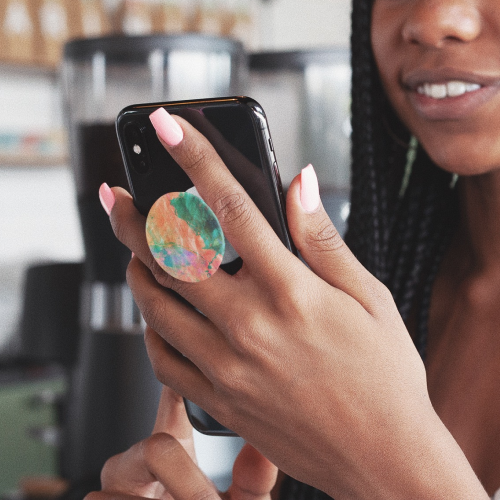
Millions of product sales have made the PopSocket® brand a popular household name. Their exclusive phone accessories can only be sold through specific, approved retailers…so we’re excited to announce that you can now sell PopSockets. Don’t forget we offer customizable phone cases too—create matching phone case + PopSocket collections to increase sales even more.
Please note PopSockets are a specialty product, so you need to unlock them in the launcher in order to sell them. PopSockets are not produced on demand, so users will need to source a minimum of 100 units in order to sell this product. You have the option to pay for inventory upfront, or you can create a pre-order listing and we’ll process orders using the money generated from pre-order sales . Continue reading to learn more about how you can source and sell PopSockets with Spring.
Part 1: Design your PopSocket
You can customize your PopSocket from top to bottom! Check out all the available options below.
Model
You can choose between two PopSocket models; the original PopGrip, or the new PopGrip – Swappable.
PopGrip: The original PopGrip sticks to the back of phones, tablets or cases with it’s rinseable, repositional gel. Once extended, PopGrip becomes a media stand for phones, a photo or texting grip, or lower for video calls. PopGrip can stick to almost any brand of phone or phone case, but may have issues sticking to silicone, waterproof cases or textured materials like leather.
PopGrip – swappable: Like a classic PopGrip, the PopSwap sticks to your phone with a repositional gel, once extended becomes a media stand and grip. The swappable function makes it easy to remove the PopTop from the base. Swap out the PopTop as needed to match your phone with your mood. Remove the PopTop to use your phone’s Qi wireless charging capabilities.
Color options
You can customize your PopSocket from top to bottom.
PopTop: You can customize the top face (PopTop) with a 2 color, 3 color, or full color design. Note the amount of colors will impact the base cost and setup deposit of your PopSocket (see pricing section below for more info).
Base: Both models’ base is available in three colors options: white, black and white/black.
Design
We require EPS or vector files when creating designs for your PopSocket. You must follow the guidelines provided in the design template so make sure to download it before submitting your request in the Teespring Launcher. Keep in mind the number of colors featured in your design will impact the base cost of the product; you can submit a 2 color, 3 color, or full color (4+ colors) design. Check out our free design collections you can apply to this product as well as our PopSocket inspiration board below. Consider creating phone cases to match your PopSockets—this is a great way to promote product collections and increase sales.
The amount of colors featured in your design and the amount of PopSockets ordered will determine the base cost per product. See the table below for a breakdown of prices and keep in mind the base cost includes inventory transport costs too.
Setup deposit: A nonrefundable setup deposit is required in order to process any PopSocket requests. The deposit is determined by the number of colors in your design. Setup deposits range from $35 for 2 colors, $70 for 3 colors and $105 for full color. The setup deposit only needs to be paid once, so if you order additional stock in the future the deposit will be waived.
Fulfillment fee: As with all custom fulfillment products, a fulfillment fee of 15% (minimum $2) is applied when a product is sold.
Profit per sale: As an example, let’s say you want to source 100 PopSockets with a 2 color design. Your selling price is $19.99. This means your deposit will be $35 and your fulfillment fee will be $2.99 (15% of the $19.99 selling price).
100 units x $5.94 base cost = $594 base cost
100 units x $2.99 fulfillment fee = $299 fulfillment fee
In this scenario you’re earning around $10.71 in profit per PopSocket sale.
Part 2: Source & sell PopSockets
Here’s a breakdown of how the process works once you’ve designed your PopSocket. Please note it will take around 7 to 10 business days from the day you submit your request to listing creation.
1. Submit request
Once you’ve unlocked this product you’ll see a ‘PopSocket’ product icon in the Launcher. Click the icon and fill out the form with your PopSocket characteristics and submit the request. We aim to process all requests within 24 – 48 business hours.
2. Pay setup deposit
Once we receive your submission we’ll send you a non-refundable deposit payment link. The deposit goes towards the set-up fee required to enable the machines to print your custom design. Setup deposits range from $35 for 1 color, $70 for 2 colors and $105 for full color. The setup deposit only needs to be paid once, so if you order additional stock in the future the deposit will be waived. Keep in mind you will only be able to withdraw profits from sales once orders are shipped to customers.
3. Approve quote & mockup
Once the deposit is paid we will process your request and follow up with a prototype mockup and quote for approval. Keep in mind inventory transportation and storage costs are included in the base cost quoted.
4. Source & sell
You have two options for sourcing and selling PopSockets with Teespring. Note the minimum order quantity (MOQ) for PopSockets is 100 units. Also, the minimum selling price for PopSockets is $9.99 and the recommended retail price is $15.99 – $29.99.
Option 1: Pay for inventory upfront: When you approve the prototype the next step is to pay for the full inventory order. Once full inventory payment is received your PopSocket order will be processed and we’ll confirm the estimated delivery time for your PopSockets to reach our facility. Please note we also recommend ordering an additional 5% of inventory for replacements and exchanges.
Once inventory reaches our facility we’ll take product photos and create the PopSocket listing for you. We’ll make sure to set the listing to ‘private’ so you can make it public and start selling when you’re ready. You can sell your PopSocket until stock runs out. You will be able to withdraw profits from sales once orders are shipped to customers.
Option 2: Run a pre-order listing: Teespring offers a pre-order option for creators who are unsure how much inventory to order or would like to avoid paying for inventory out of pocket. This enables you to avoid the risk of sourcing too much inventory or having to pay for the products upfront.
After approving the mock up you’ll need to confirm the minimum order quantity (MOQ) you’re comfortable with—i.e. the minimum number of PopSockets you plan to sell. Note the MOQ must be at least 100 units.
Next we’ll create a pre-order listing for buyers to reserve their PopSocket. The pre-order period usually lasts two to four weeks. The limited time aspect can create FOMO (fear of missing out) and result in more orders placed within a short period of time.
We’ll inform buyers of the estimated delivery timeline for their order on the listing page and within confirmation emails. We’ll also advise them of the minimum order quantity so if the MOQ isn’t reached they’ll understand why their order is canceled.
After the pre-order period ends (and MOQ is reached), we will deduct the cost of PopSocket inventory from the reservation profit in your Teespring account and place the order. Please note you can withdraw profits once orders are shipped to customers.
Depending on the quantity of PopSockets, inventory should arrive within one to two weeks. At that time we’ll send the orders to your buyers. Once orders are dispatched your profit will be available for withdrawal.
Please note, if you do not achieve the minimum order quantity required by the end of the selling period, all orders will be cancelled and buyers refunded. Also, with pre-order listings the quoted base cost is “locked” once approved and will not be adjusted if you sell into the next price bracket. For example, you chose the base cost for 100 units, and you sell 502 by the time the pre-order period ends. In this case your base cost will remain the same and not be adjusted.
5. Get Paid
After all PopSocket orders are shipped to buyers, profit from sales will be available for withdrawal within your account.
Visit the Launcher now to see if you’ve unlocked PopSockets!
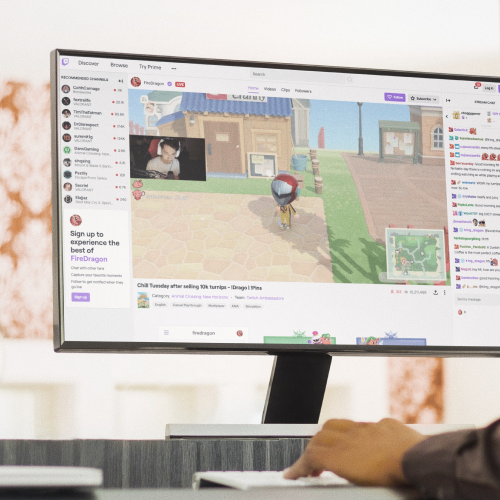
Twitch’s 15 million+ daily active viewers and massively engaged audience makes it the perfect place for streamers to promote their products. Plus you’ll get even more out of the platform using our powerful integrations; the Twitch Merch Store Panel Extension provides customers with a fully-integrated shopping experience and our Streamlabs integration enables buyers to create personalized merch alerts post-purchase that are visible to you and all viewers on stream.
Don’t forget Teespring is one of the only platforms that enables you to create subscriber-exclusive merch for Twitch too. Whether shoppers access your products through the panel extension or your merch store, they’ll have to verify their subscriber status to purchase these exclusive products. This can be a good tactic for increasing subscriber count while driving sales through limited edition products.
Learn about the top 12 ways streamers are promoting and selling merch on Twitch in the video below. Pick and choose your favorite tactics or use them all to supercharge your sales. Don’t forget to check out Teespring’s complete promo guide for in-depth details and real-world examples of these tips in action. Complete Twitch promo guide.
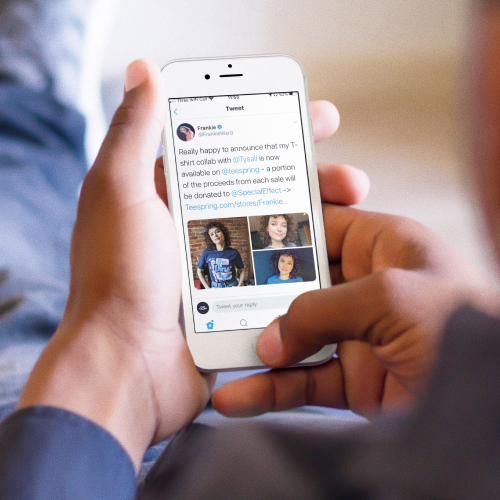
Twitter has an average of over 300 million monthly active users and it’s the 7th most visited website in the world! Also, over a third of Twitter users buy from a brand they follow—making it a great platform to promote and share your Teespring products. Most brands and organizations have Facebook accounts already, but if you’re new to Twitter you can learn about getting started here.
Using Twitter to promote your products is very easy…but there are a few things you should keep in mind to get the most out of your tweets. The video and complete guide linked below, which are full of examples of how creators are using Twitter’s features successfully—get inspired and try them out for yourself!
Christian Hayes is passionate about food. After starting a successful catering company with his wife, Christine, the couple decided to open their restaurant, The Garrison. Located in Yarmouth, Maine and surrounded by the rushing Royal River, their restaurant serves ‘thoughtful food’ and prides itself on having a brilliant and kind team.
Generate pure profit
Business was booming until COVID-19 spread across the world. Like many small businesses, social distancing and lock downs have hit The Garrison hard and forced Christian and Christine to make some very difficult decisions.
“It’s been awful. Restaurants, hospitality, and catering are all centered around the pretty basic concept of humans congregating. When a pandemic’s direct response is for people not to gather for an unforeseen amount of time – that decimates our industry. We already function on the slimmest of margins. One week off, and you start to feel the pressure. Having to lay off our invested staff who have built these companies beside us was heartbreaking.”
Despite the hardships Christian and his family continue pushing forward. He’s committed to finding new ways to generate income until this passes and life returns to normal—including creating branded merchandise.
“Business is about playing offense and defense, and adapting. You got to pivot. Teespring allowed us to add a revenue stream of pure profit, with no expenses. That’s invaluable in times like these.”
Create appealing designs
Christian was able to create a new merch collection, a custom store, and started getting sales within a week of signing up to Teespring. His designs are inspired by his love of rock & roll and motorcycle culture, and similar to his restaurant the aesthetic uniquely combines a high-end look with a bit of attitude. The main thing for Christian was creating products he would want to wear.
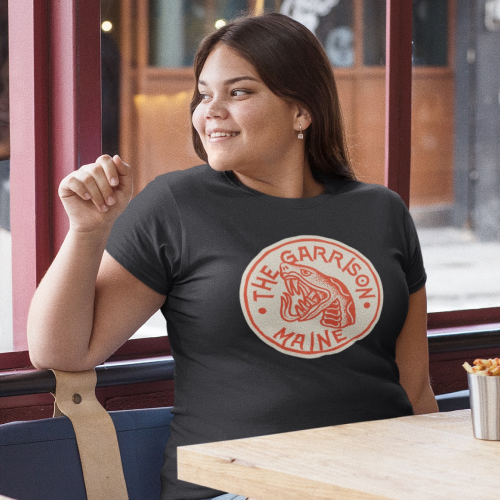
The Garrion’s merch features several different design collections. Their most popular product so far is the premium tee in the Snake Bite design. Apart from tees, Christian also offers sweatshirts, hoodies, tote bags, tank tops, women’s tees, and die cut stickers featuring each design.
Community is key
Christian’s merch collection has enabled his community and loyal patrons to show their support for the business. He’s utilizing social media to let people know about the products and has been overwhelmed by the response. Following promotional best practices like sharing visual posts is effective for creating engagement and driving sales.
“Obviously social media is paramount, and staying ahead of the curve on those platforms is key. We have an incredibly loyal customer base who desperately want to help, so fueling the fire by creating things they can get excited about is priority. The way the community has gathered around us to offer support and words of encouragement has been so overwhelming and humbling. It reminds us that human beings are incredible.”
Never give up
While no one knows what the future holds, Christian plans to further diversify income through merch and creating new services at the restaurant like prepped meals, staple boxes with fresh ingredients, and more.
“Stay up. It’s times like these that make us who we are, so keep swinging, and look out for each other. It’s the only thing we can do.”
With the global outbreak of COVID-19 many businesses find themselves in a challenging situation. Establishments that traditionally rely on foot traffic and appointments are taking a hard hit to their income with social distancing being practiced in countries worldwide. So how can businesses garner support from their loyal customers until things return to normal?
Creating new opportunities through merchandise
A growing number of local businesses have started selling merch on-demand in an effort to supplement income during this time. This concept isn’t new, in fact we’ve seen many businesses use branded merch over the years as a marketing tool and source of diversified income. Selling merch on demand is free because there’s no upfront inventory required, plus Teespring handles order fulfillment and customer support so valuable time can be focused on running your business instead of dealing with logistics and hassle.
Jamie and Evan Shipp, owners of GoodShipp Alpaca Co. in Louisville, Kentucky, used merchandise to supplement their income as they expanded their Alpaca shearing products and services. The revenue earned from merch sales has gone toward general farm expenses, but has also helped expand their herd with a new alpaca named Hank!
D&B Performance and Automotive Repair, located in Burrillville, Rhode Island is owned by Dawn and Bob Tufano. This local auto shop has been family owned and operated since 2000. After customers began to inquire about their employees’ unique uniforms, daughter Rachel Tufano created print-on-demand apparel and added them to a store on Teespring. Current profits are put towards funding daily expenses, such as payroll, new uniforms, and garage supplies, and customers wearing their merch around town helps to attract new customers.
“The customers were actually a pretty big part of why I chose Teespring as well, because I’d be able to just give people the links to the designs and they could purchase them on their own versus us having to order hundreds in bulk and either give them away for free (which is SO costly) or make little to no profit on them because they were so expensive to buy to begin with (again, SO costly).”
Emily and Marc Vance of Dill Farms created branded merch is another example of a small business using merchandise to market their services and engage with their local community in Fort Scott, Kansas.
Do you know a business that needs support?
If you know a business going through a tough time due recent events send them our way. We’ll help them set up their own online merch store and provide additional promotional tools and assistance if necessary. This service is totally free to use, and businesses will keep all profits from product sales. Plus we’ll handle order delivery and customer support too so they can focus on running their business.